This is another post I made to our Relief Society blog. This is a great recipe for first time bread makers as you can learn the "feel" of the dough and how to incorporate all ingredients by hand. This recipe also works well if you're using a stand mixer. The result is a versatile light, fluffy dough that can be used to make a variety of breads and rolls.
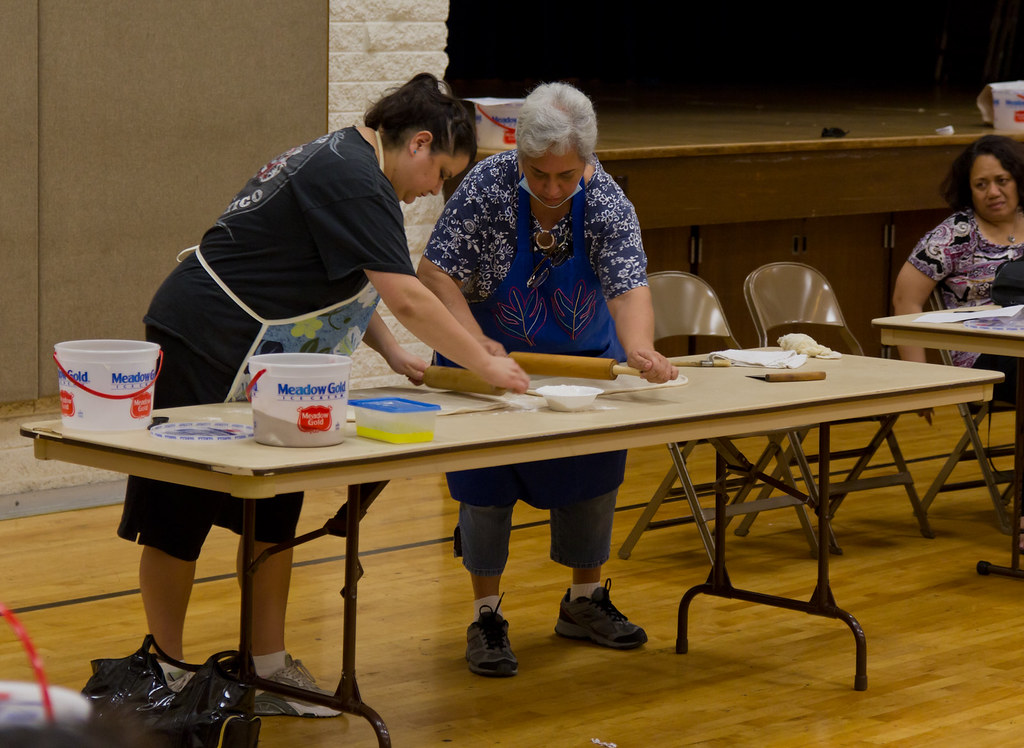
Katherine Book of the Auwaiolimu Ward taught us how to make homemade bread at our Weekday Relief Society Meeting on Wednesday, April 6, 2011. This hands on class was a great opportunity for us learn how to mix the ingredients and feel the texture of the dough to get the bread just right.
Here's the recipe:
Ingredients for Half Batch:
4 cups Bread Flour*
1 Tbs self acting fast rising Yeast
1 tsp Salt
1/4 cup Powdered Milk
1/4 cup Sugar
1/2 stick (1/4 c)Butter or Shortening
1 1/2 cup warm Water
1 tsp Vanilla Extract (optional)
yield: 1 1/2 doz rolls or 2 loaves
Baking time: 30 minutes Baking temp: 350 degrees
Ingredients for Full Batch:
8 cups Bread Flour*
2 Tbs self acting fast rising Yeast
2 tsp Salt
1/2 cup Powdered Milk
3/4 cup Sugar
1 stick (1/2 c.) Butter or Shortening
3 cups warm Water
2 tsp Vanilla Extract (optional)
yield: 3 to 4 dozen rolls or 2 to 3 loaves.
Baking time: 30 minutes
Baking temp: 350 degrees
* Note: you may substitute all purpose flour instead of bread flour if desired. Resulting bread may have a different consistency. Bread flour has more protein which leads to more gluten allowing your bread to be more stretchy creating more of a "chewy" texture whereas all purpose has less protein and makes a less stretchy dough creating a more "crumbly" texture.
Instructions:
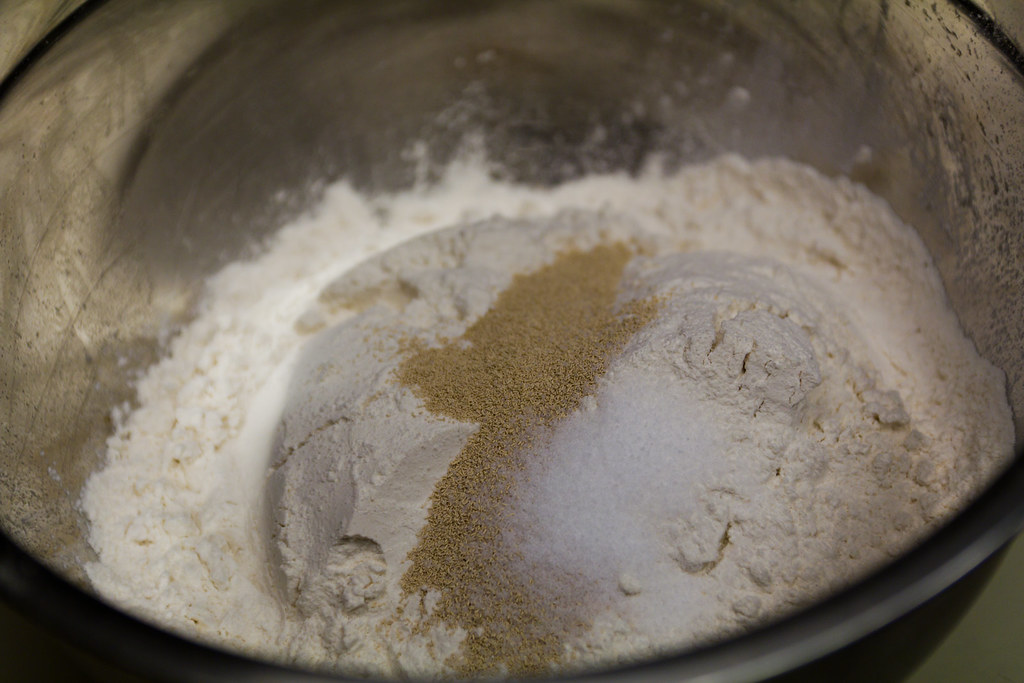
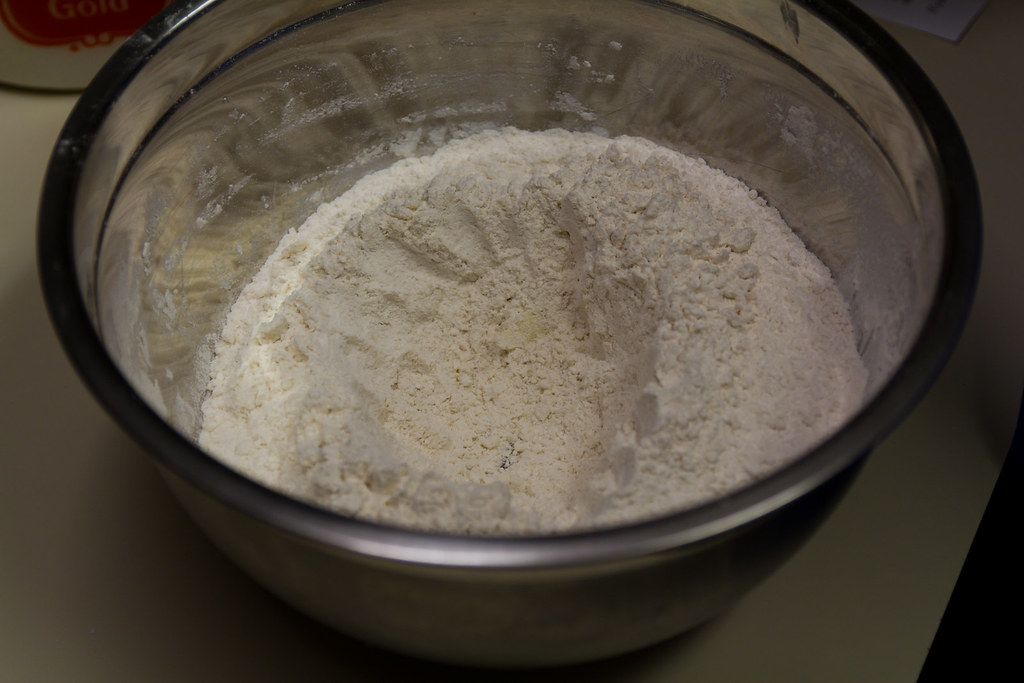
1. Combine all dry ingredients (including dry yeast) in a large mixing bowl. Mix well to incorporate all ingredients.
2. Add butter or shortening.
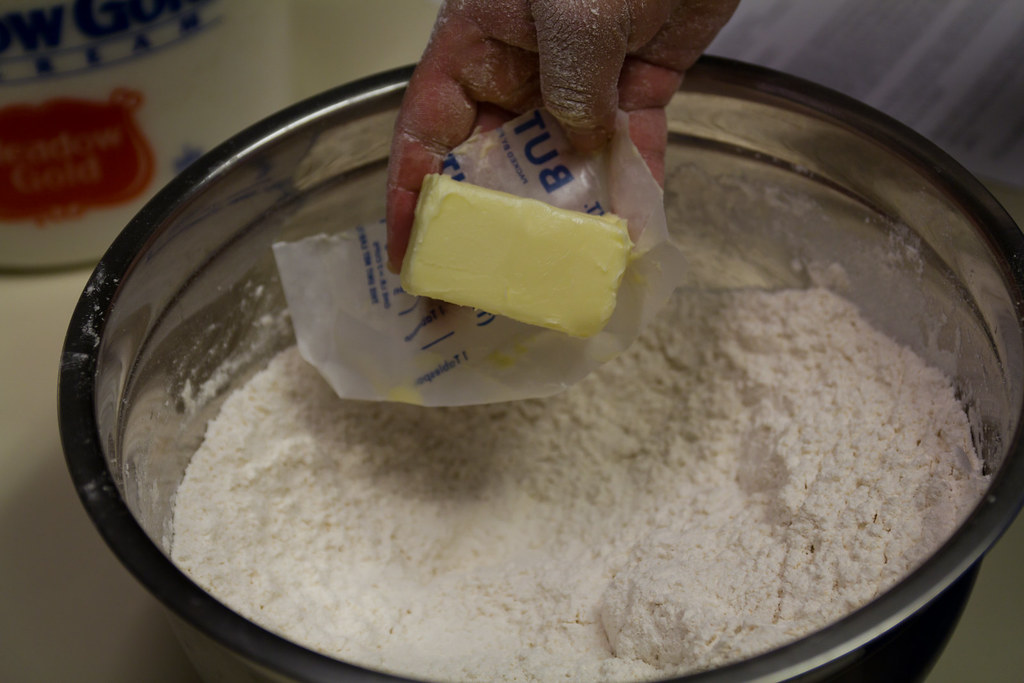
3. Using hands squish butter into small bits through out the dry mixture until the consistency is similar to coarse corn meal.
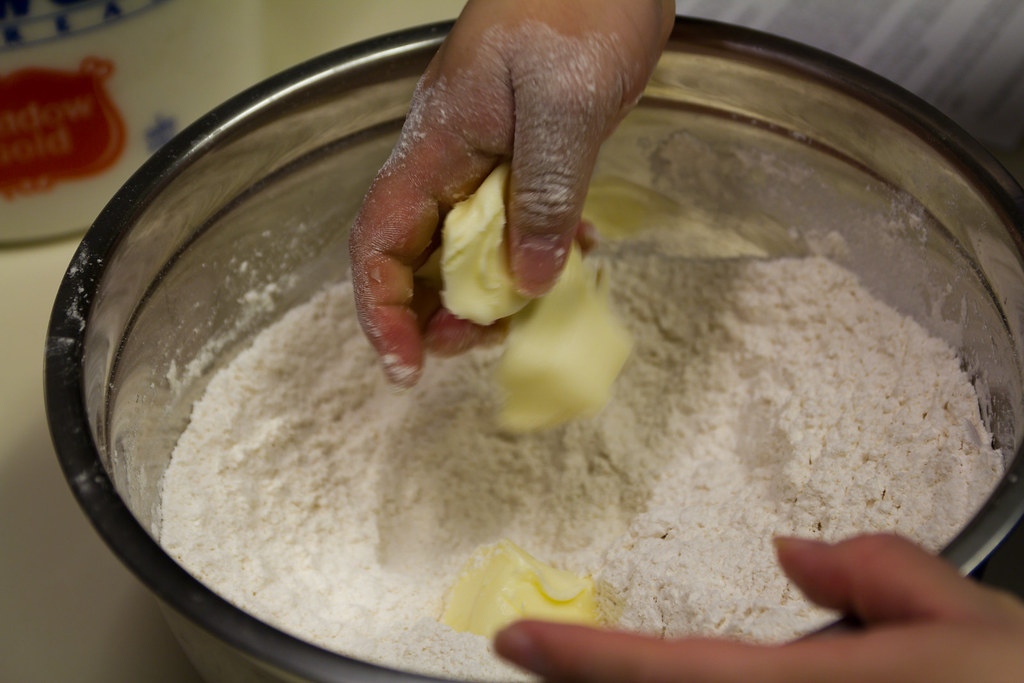
4. Create a "well" or indentation in the middle of butter/dry ingredient mixture.
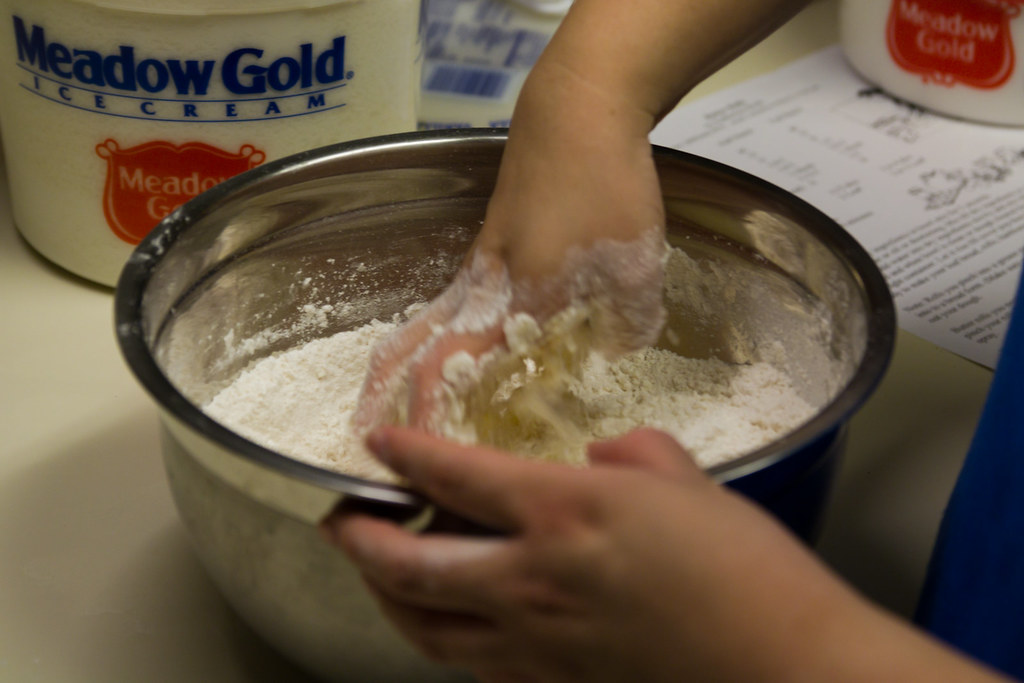
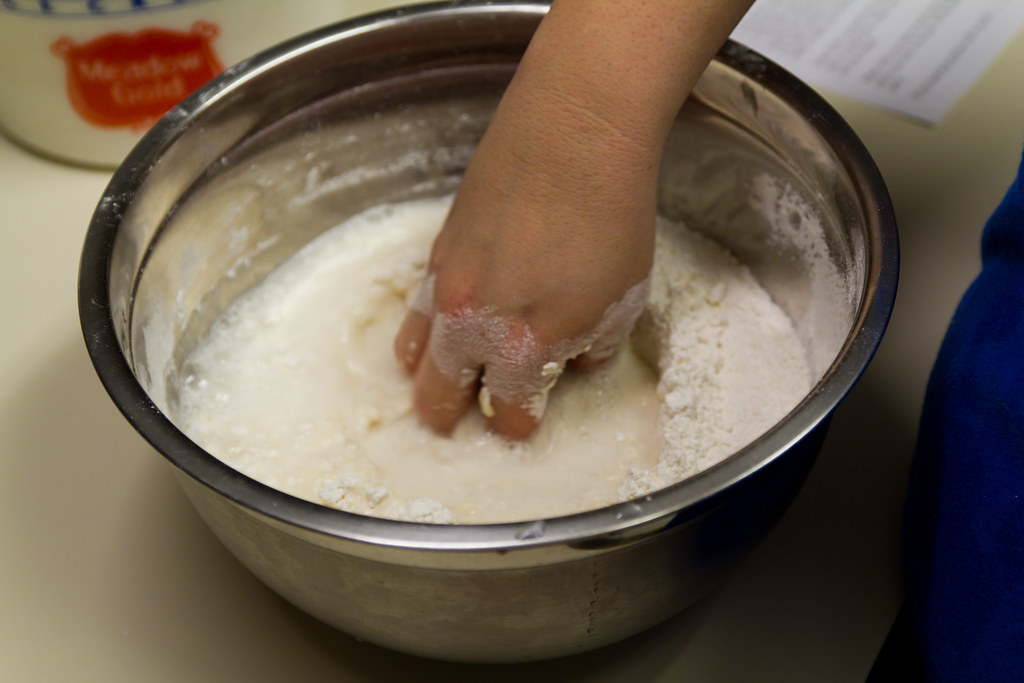
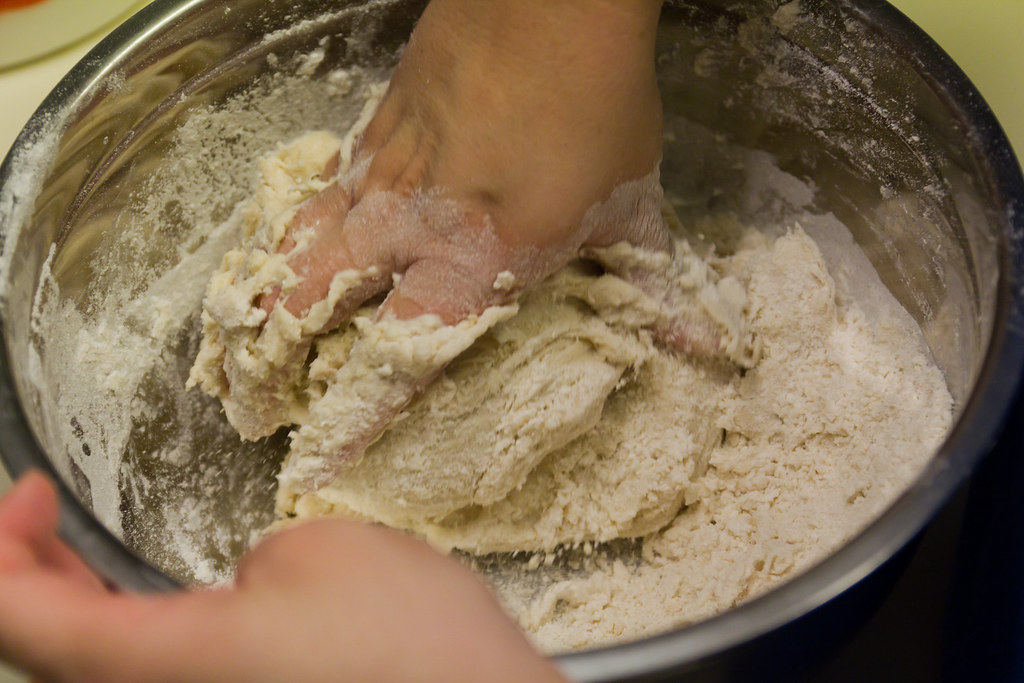
5. Pour warm water into the well and begin slowly incorporating the flour into the water mixture.
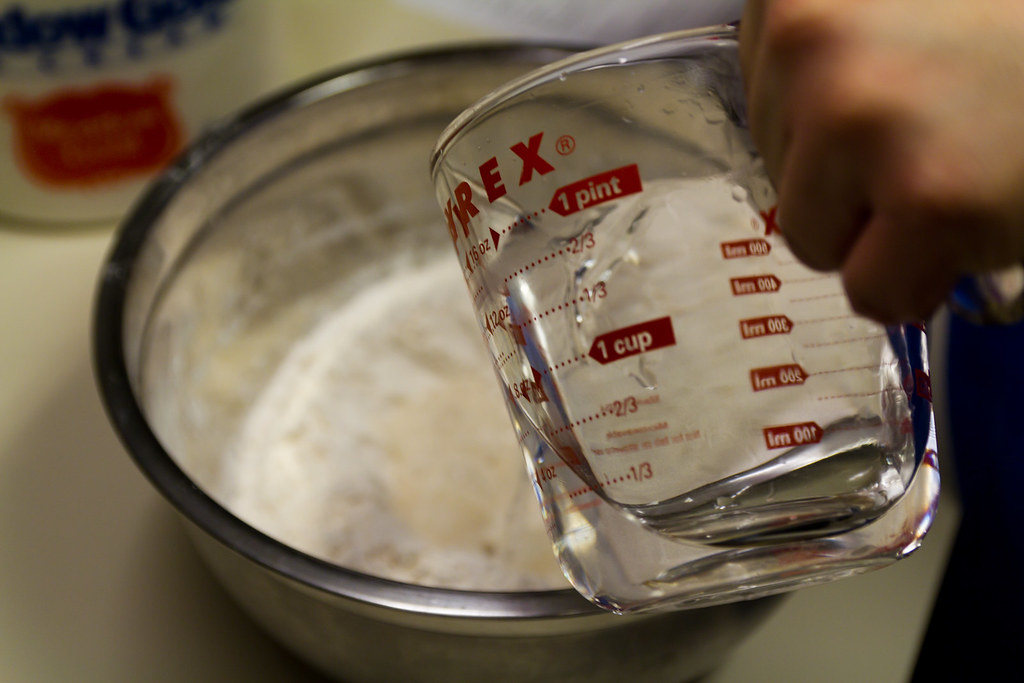
Note: Make sure your water isn't too hot otherwise it will "kill" the yeast and the dough won't rise. Water should be like the comfortable warm temperature you would use to bathe.
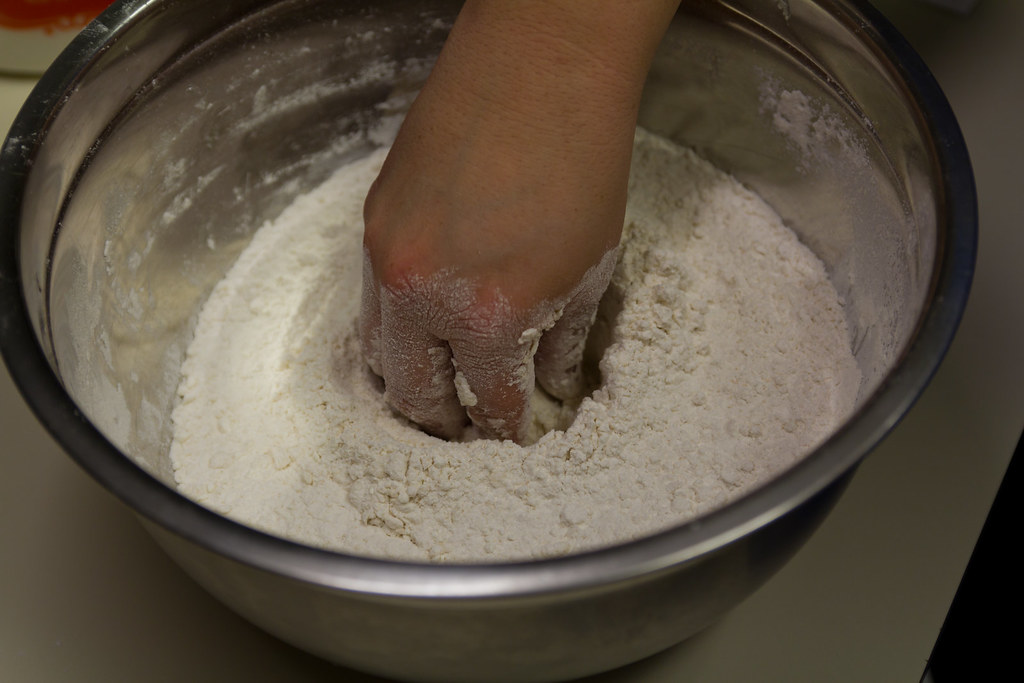
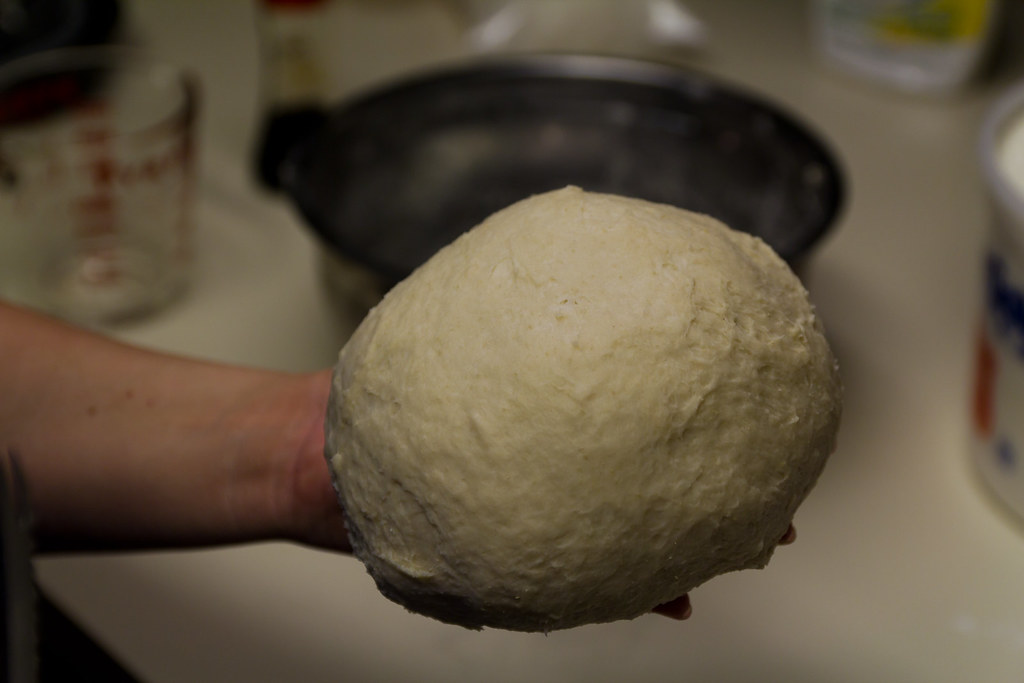
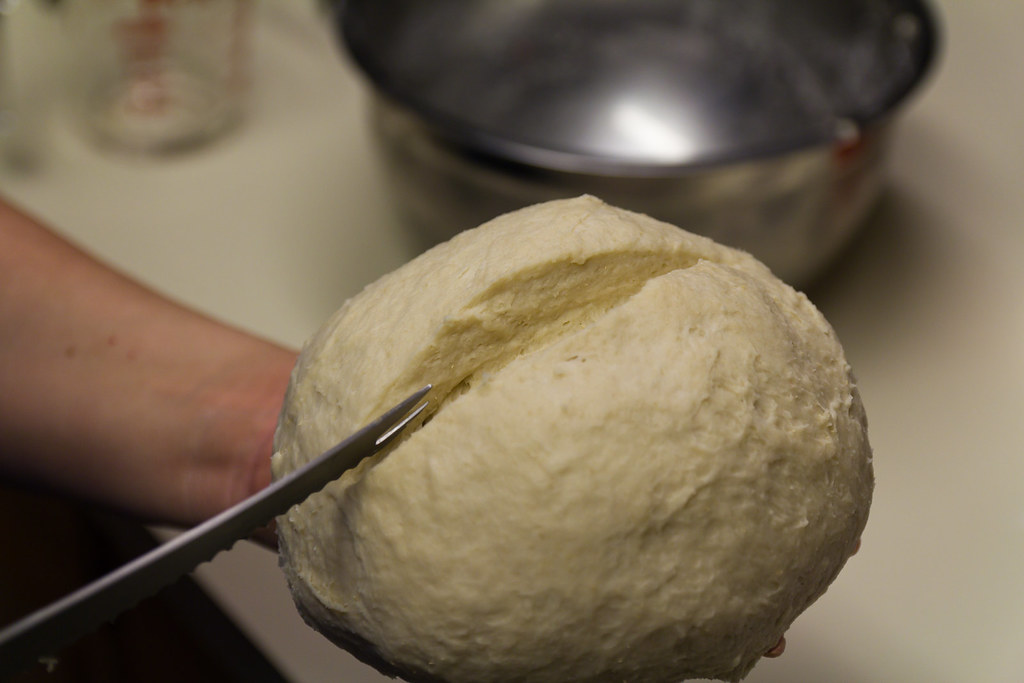
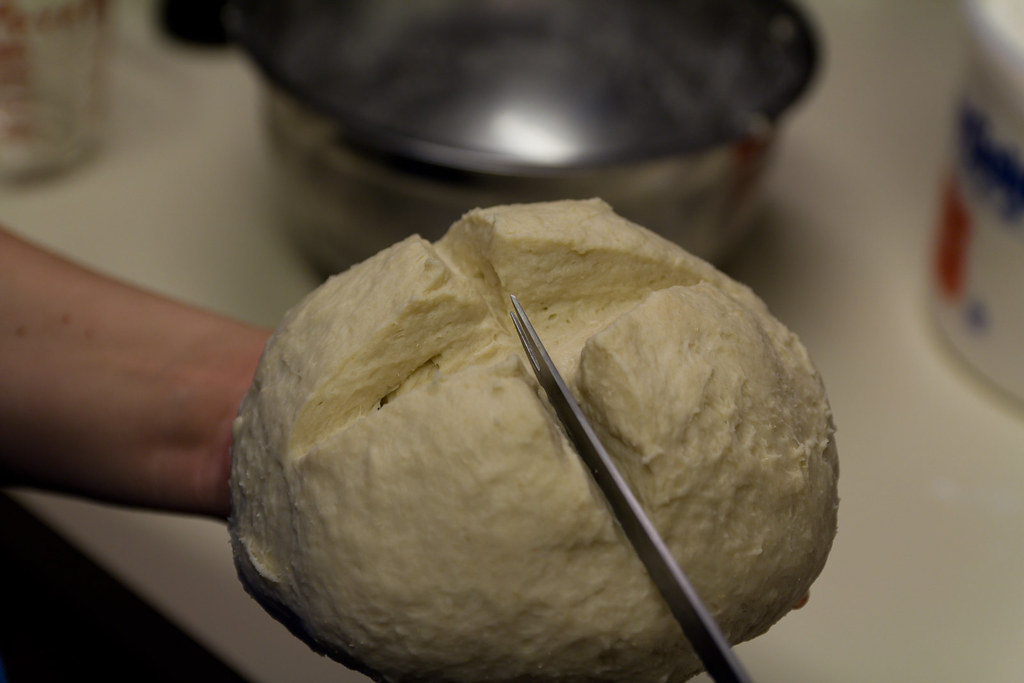
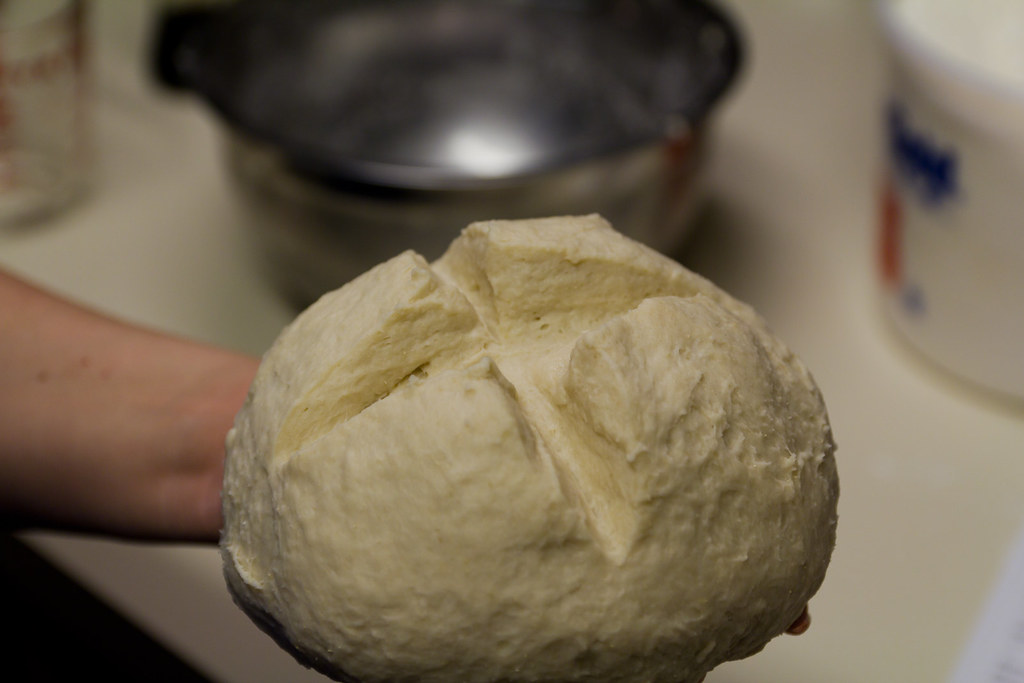
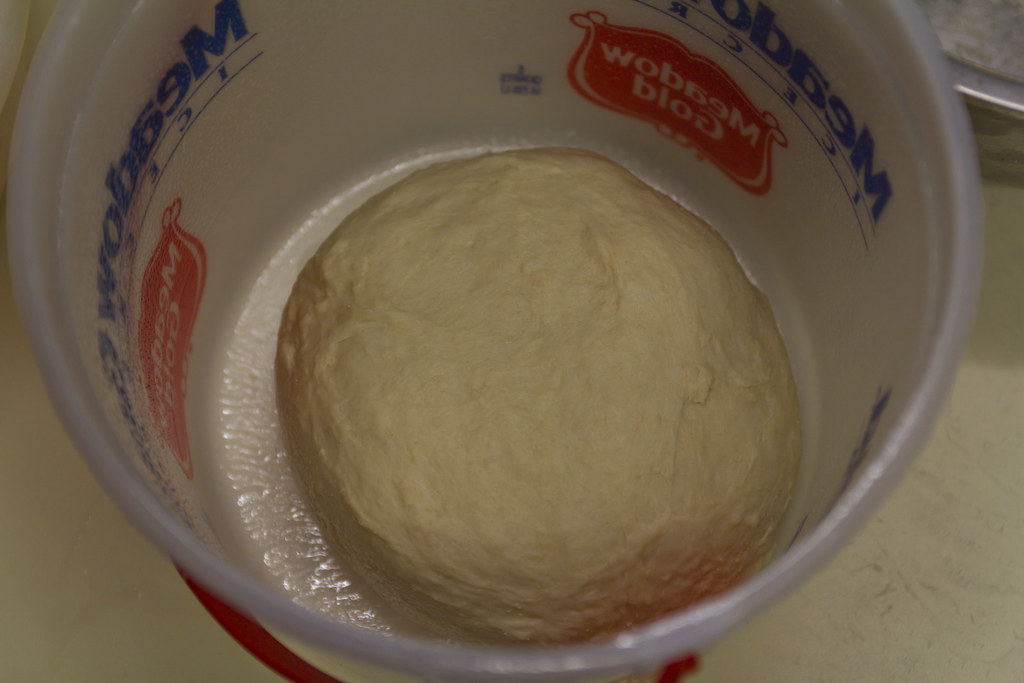
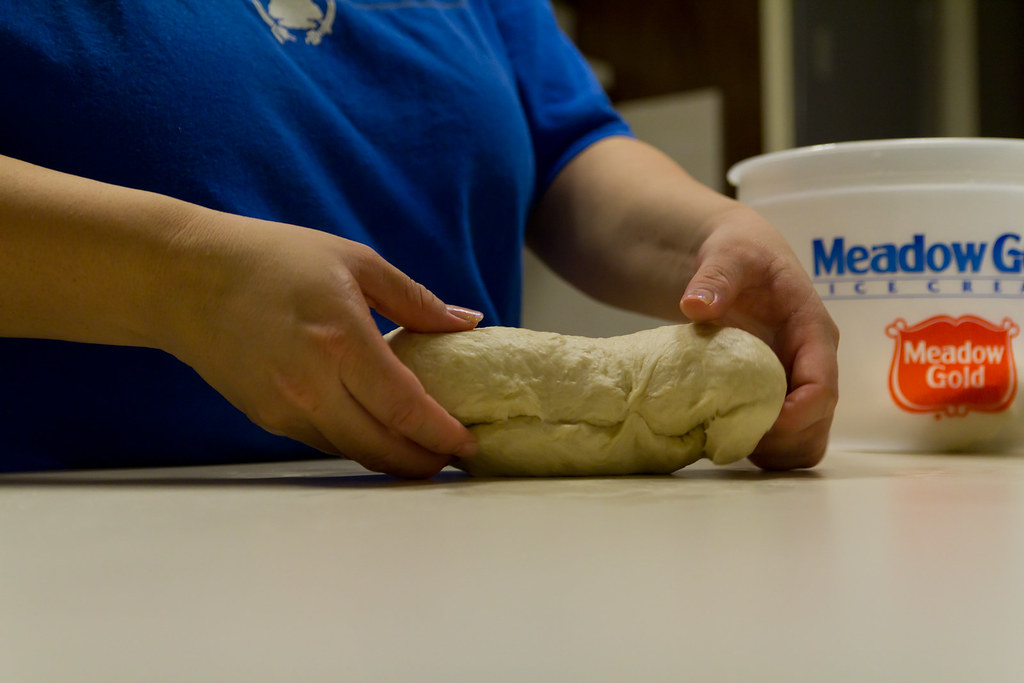
6. Continue to stir and knead mixture in until all the flour and water are incorporated and the dough forms a ball.

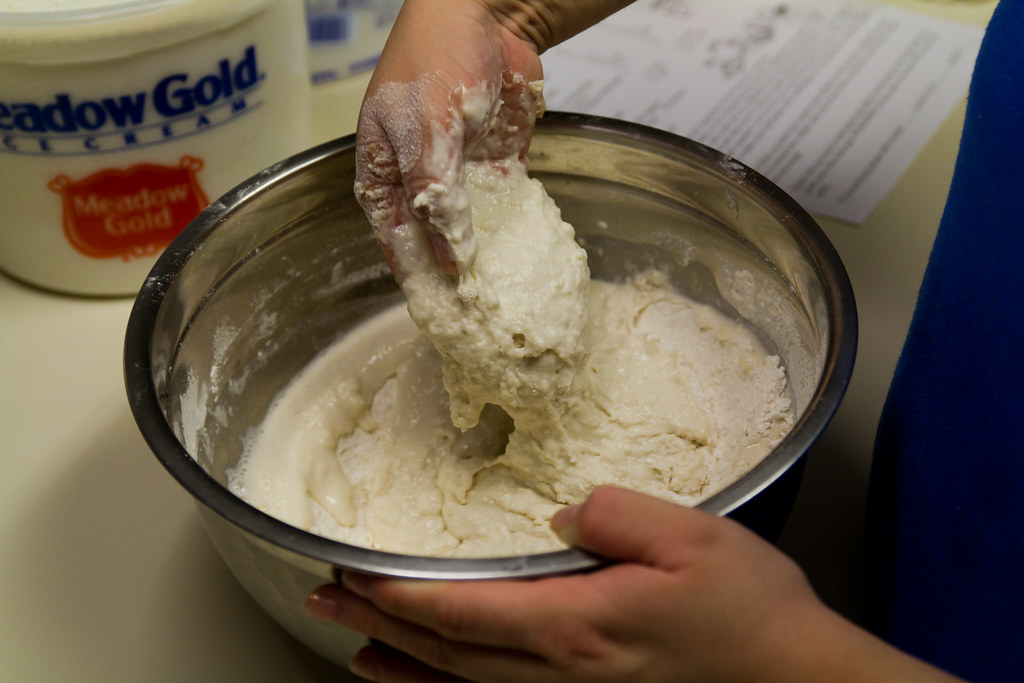
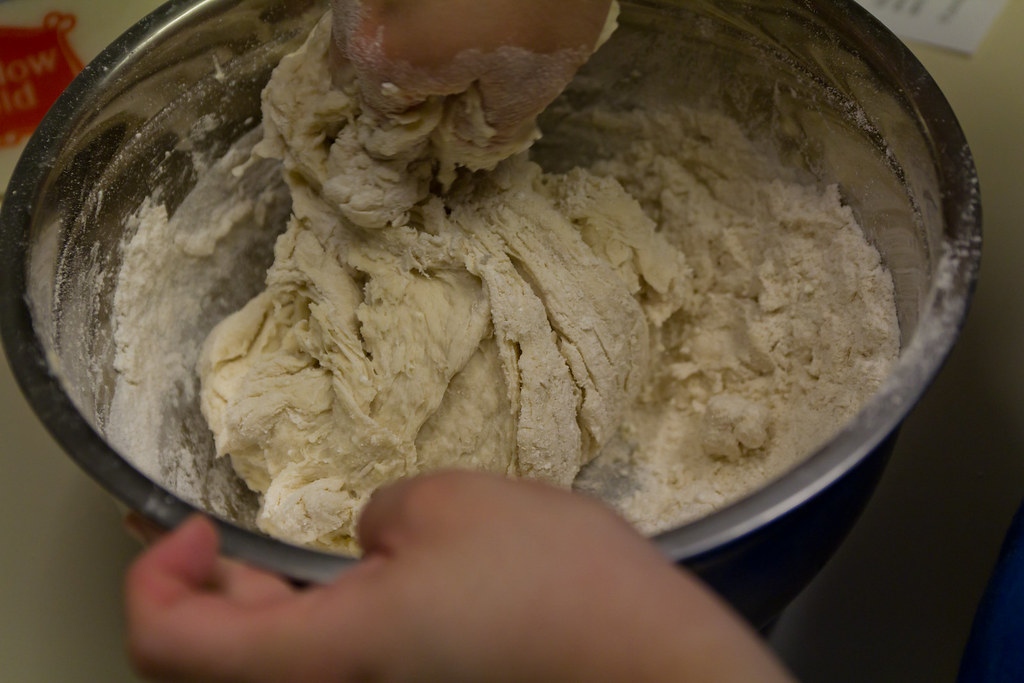
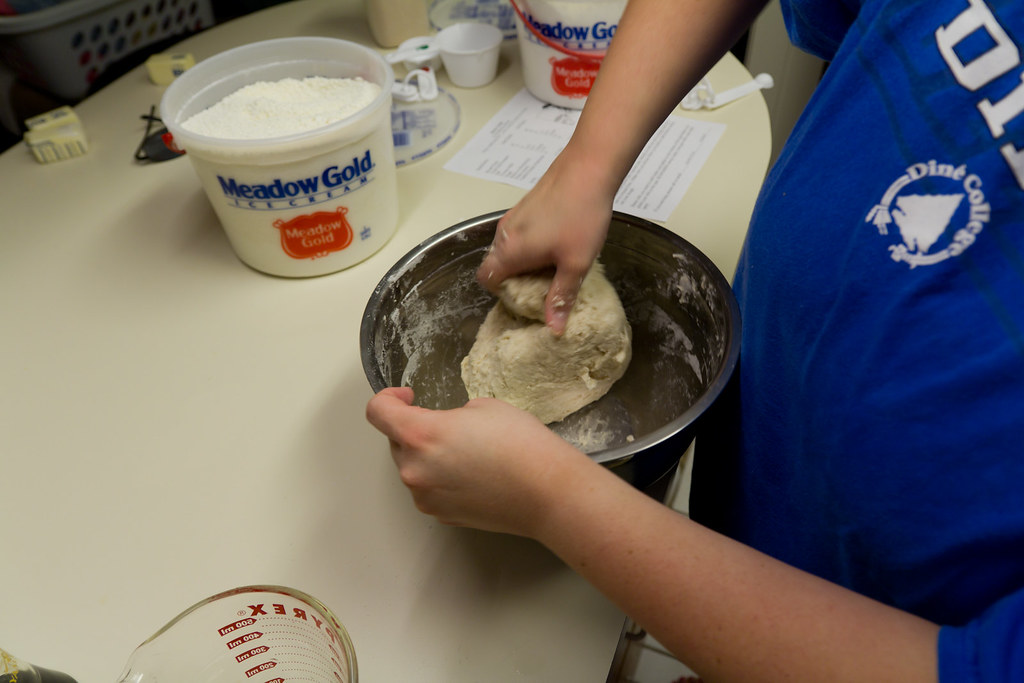
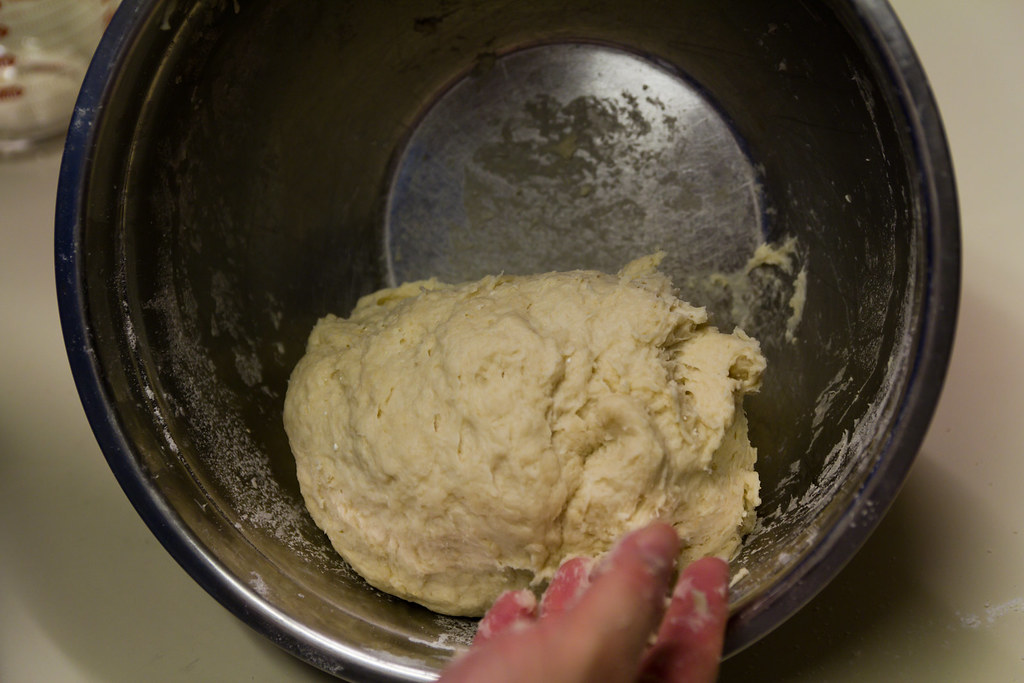
To test when you have kneaded the dough enough, slice an "X "mark on top of the ball of dough. If the dough begins to separate, it has been kneaded enough and you can set it aside for rising.
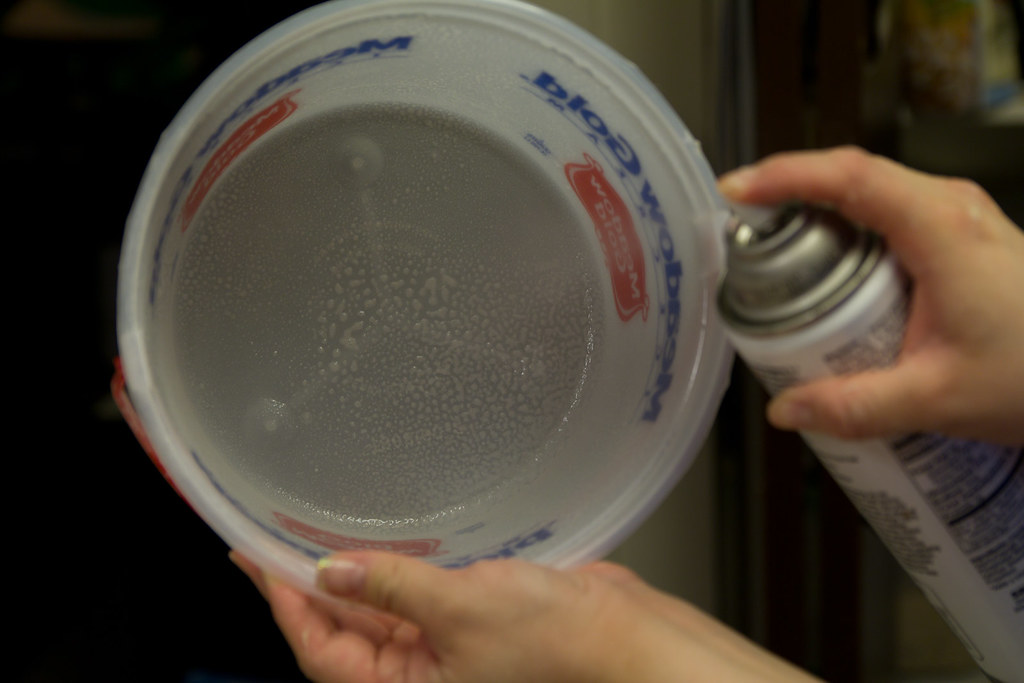
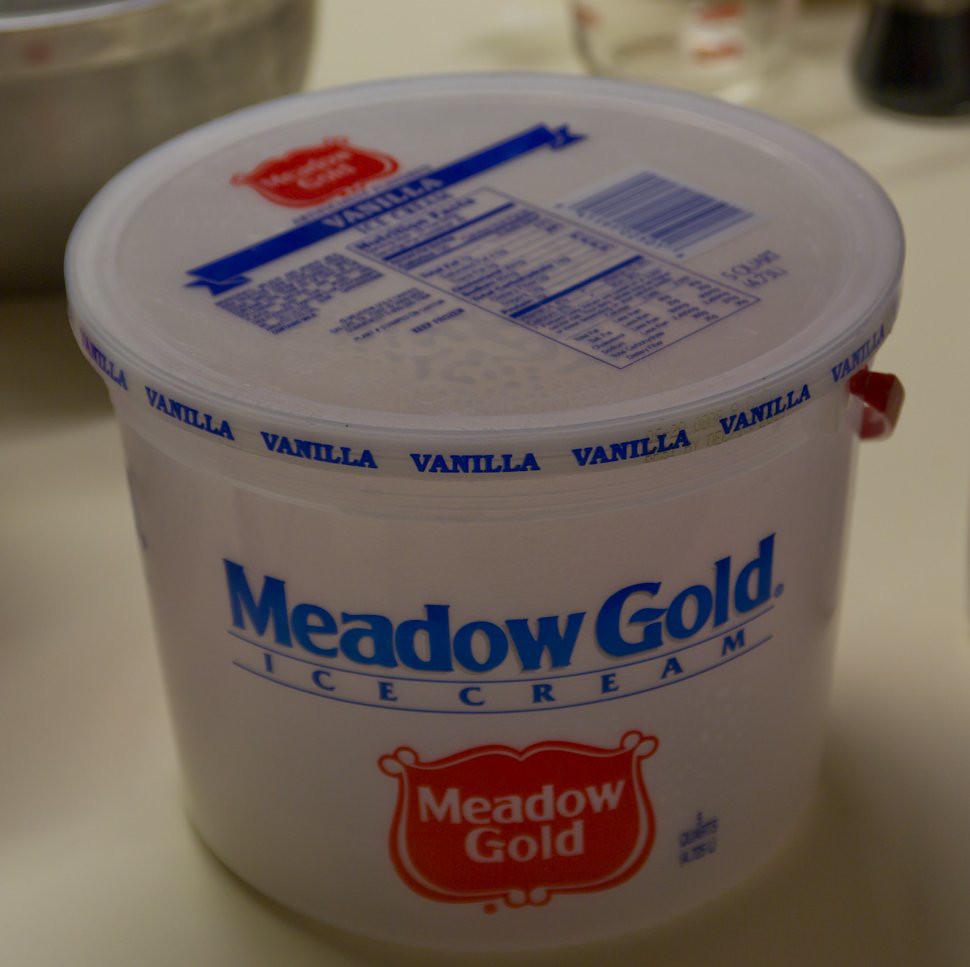
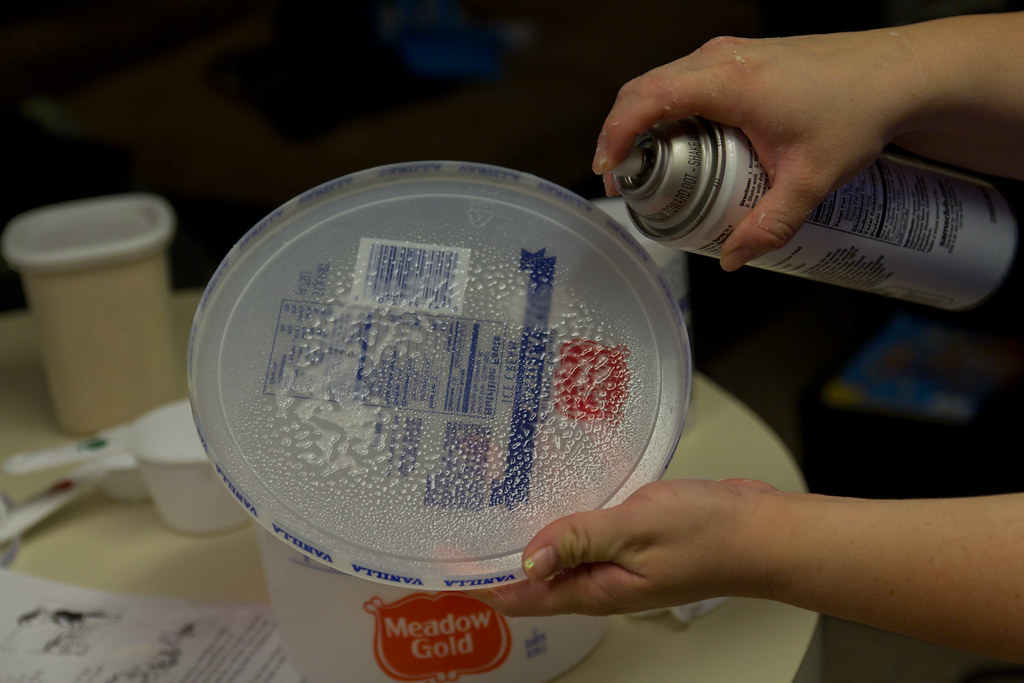
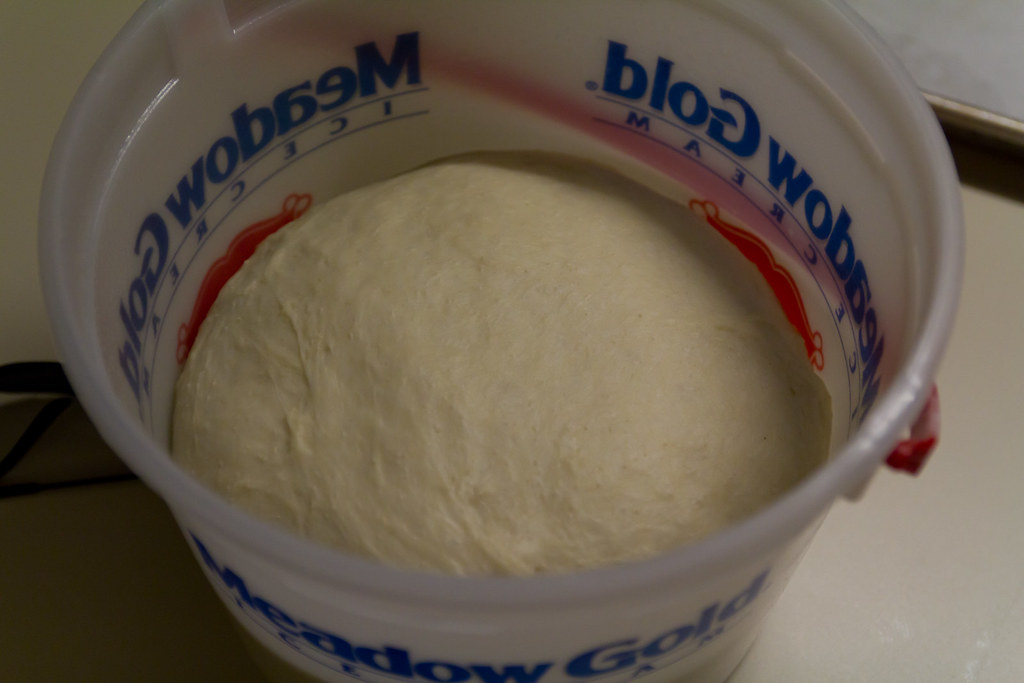
7. Place dough ball into an airtight container that has been pre-greased with oil or shortening or sprayed with non-stick cooking spray. Kathy Book recommends using a gallon size ice cream container with a lid.
8. Set aside dough and allow to rise until double in size.
Note: A full size batch of the bread recipe will rise to pop the lid off the container when it has risen to double in size.
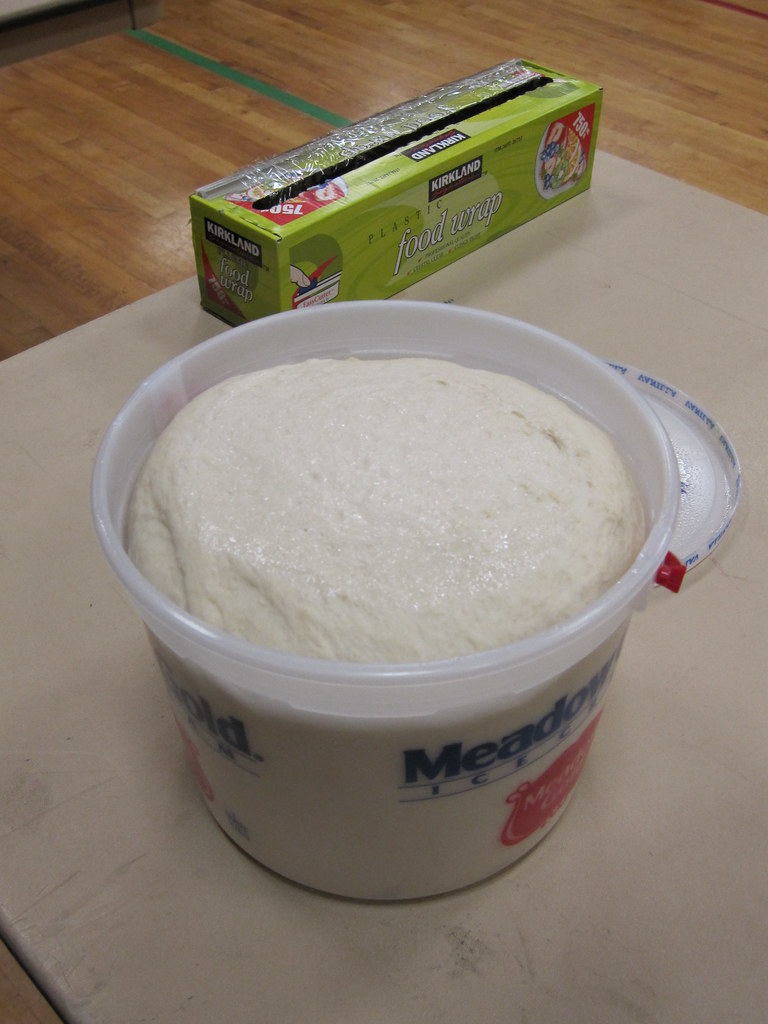
Don't forget to spray the bottom of the lid so the dough doesn't stick when it rises.
Note: A half batch recipe will only rise half way in a gallon size ice cream container when double in size.
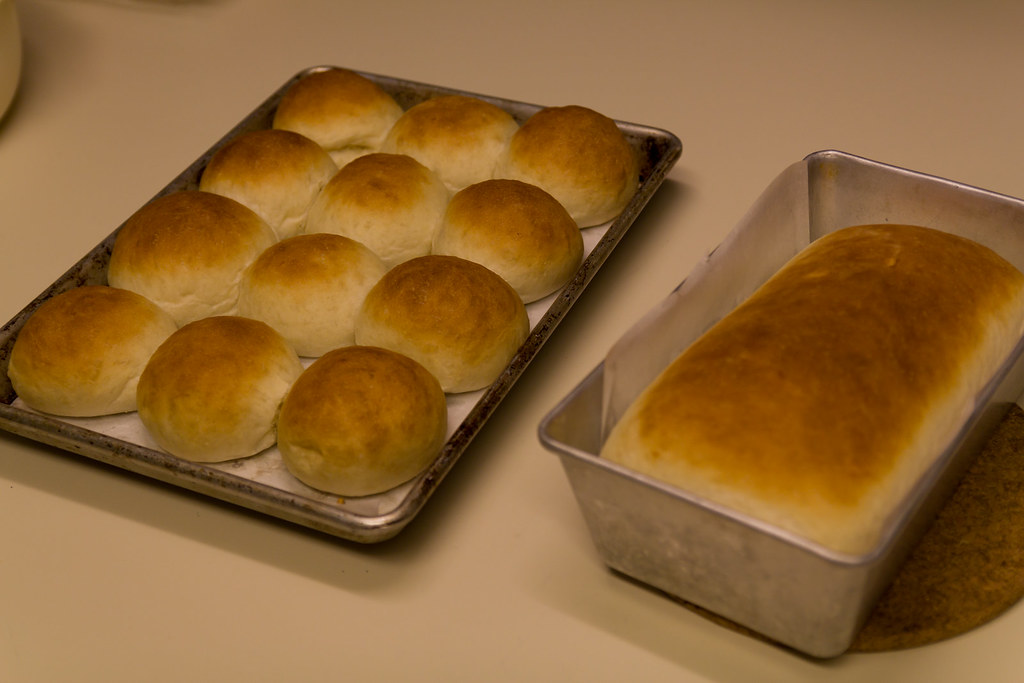
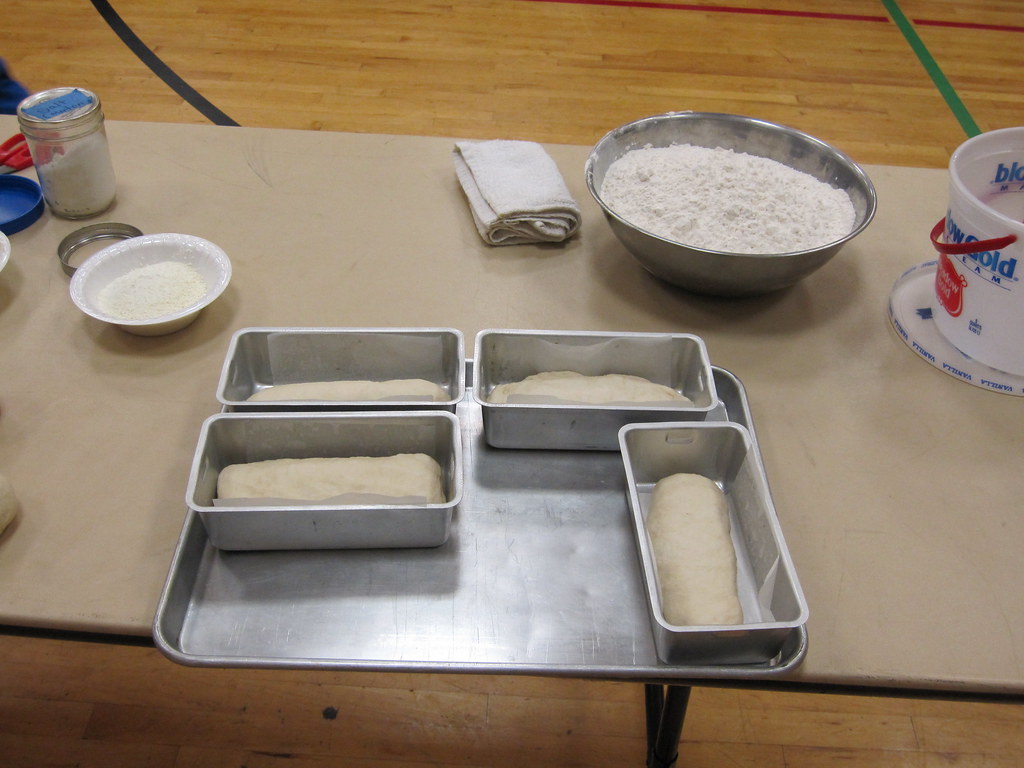
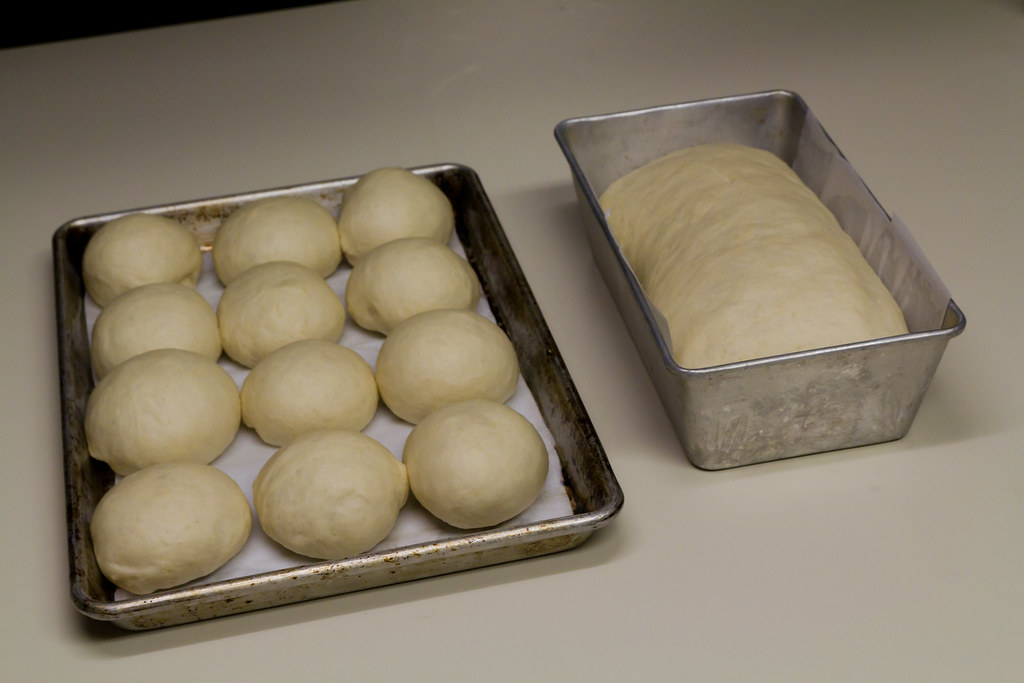
9. After dough has doubled in size. Punch it down to deflate the dough and let it rest 5 minutes. 10. Then shape into desired loaves, rolls, hamburger buns, hot dog buns or cinnamon rolls (one dough can make all these kinds of breads!). 11. After shaping dough and placing in baking dishes, allow to rise until double in size and then bake.
To Shape rolls: Pinch balls of dough out a little smaller than a golf ball.
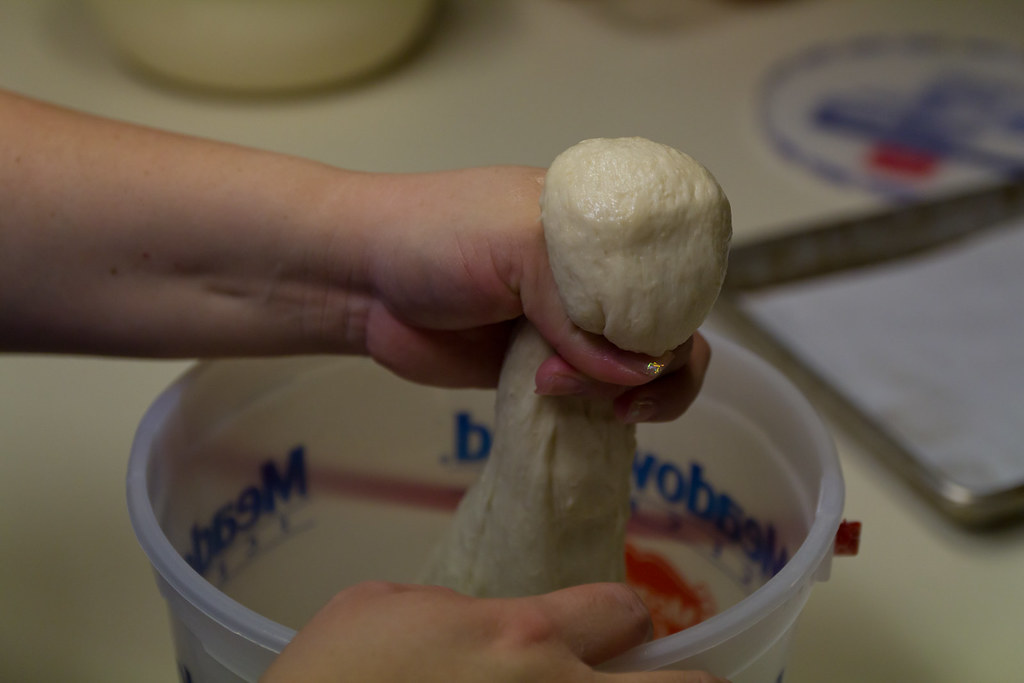
Rolls into balls to smooth the surface and place on baking sheet, leaving enough room between each ball of dough for expansion.


For Butter rolls: melt 1/2 to 1 stick of butter and pour on bottom of pan before adding formed rolls. Baking time for rolls is 20-30 minutes @ 350 degrees.
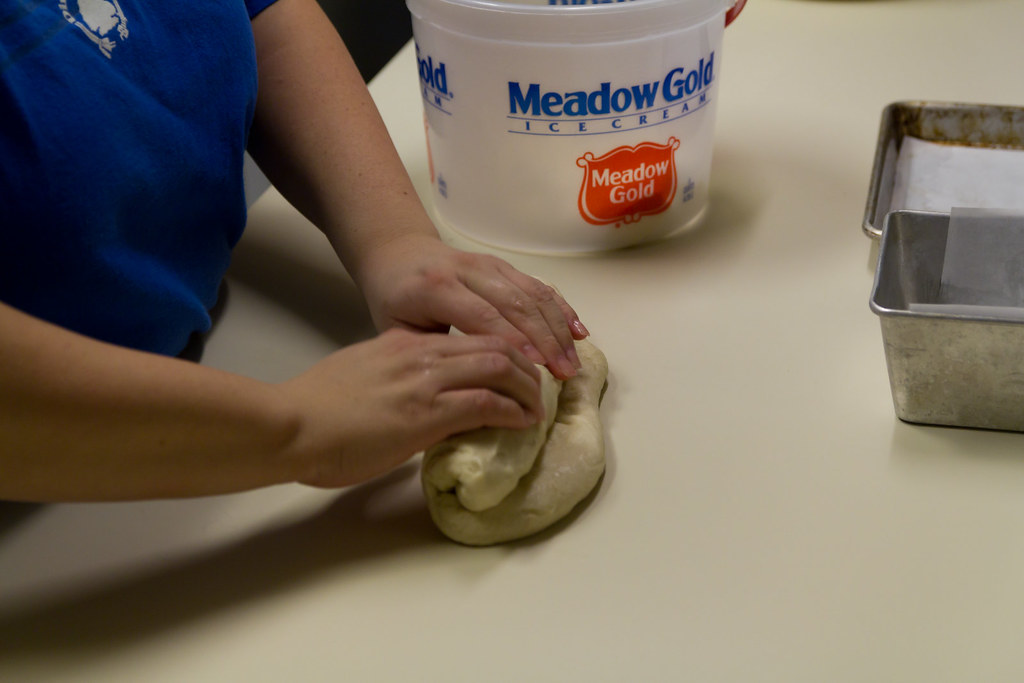
To Shape loaves: Flatten out dough on table with hands into shape of a rectangle. (doesn't need to be perfect Spray surface of table with non-stick spray or use flour to keep dough from sticking.
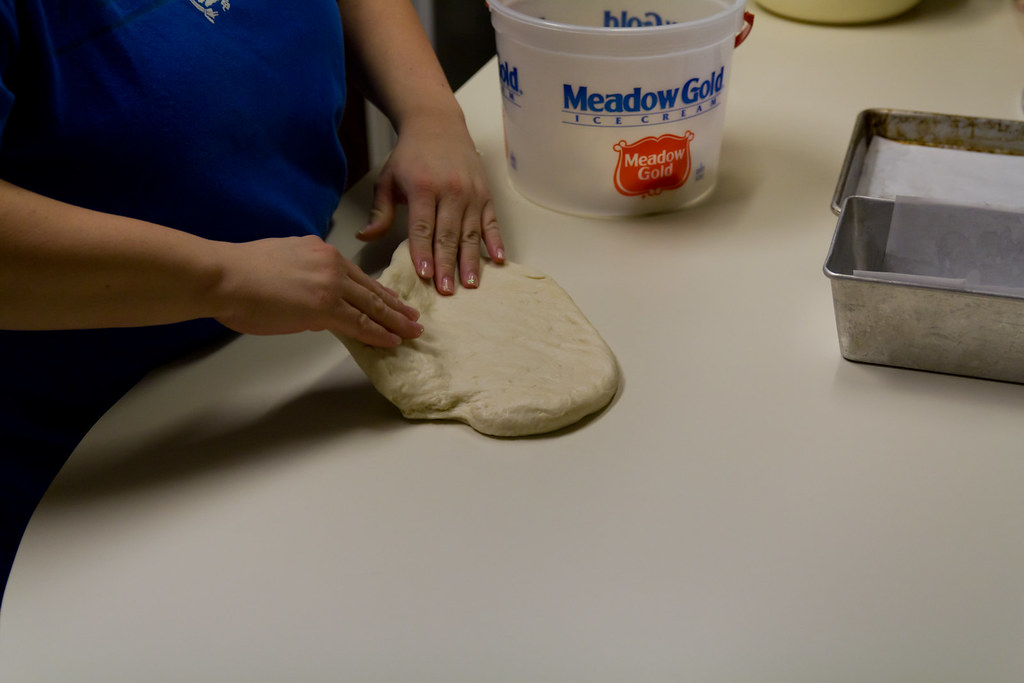

Then roll dough from one edge to the other. Pinch seam closed and place in loaf pan and press down.
Baking time for loaves is 20-30 minutes.
For hot dog buns: use same method as shaping for loaves only using less dough to make smaller "loaves" place evenly on baking sheet.
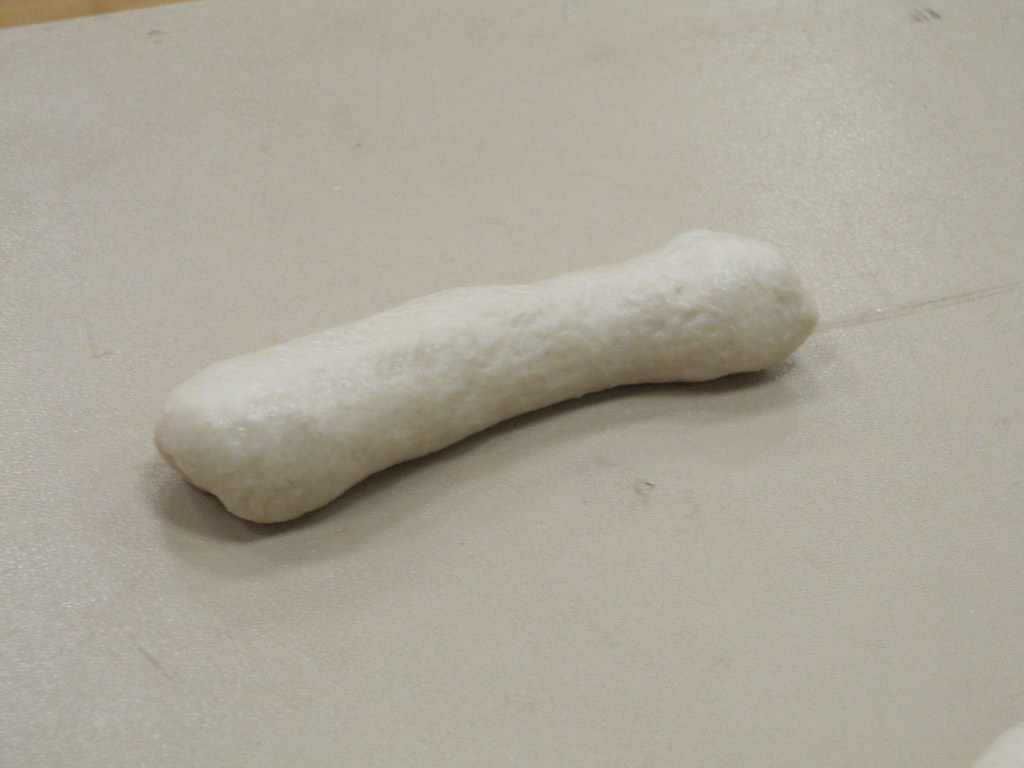
For Hamburger Buns: Pinch off dough the size of a tennis ball. Roll between hands to smooth surface. Place on baking sheet like you would for rolls then press down to flatten.
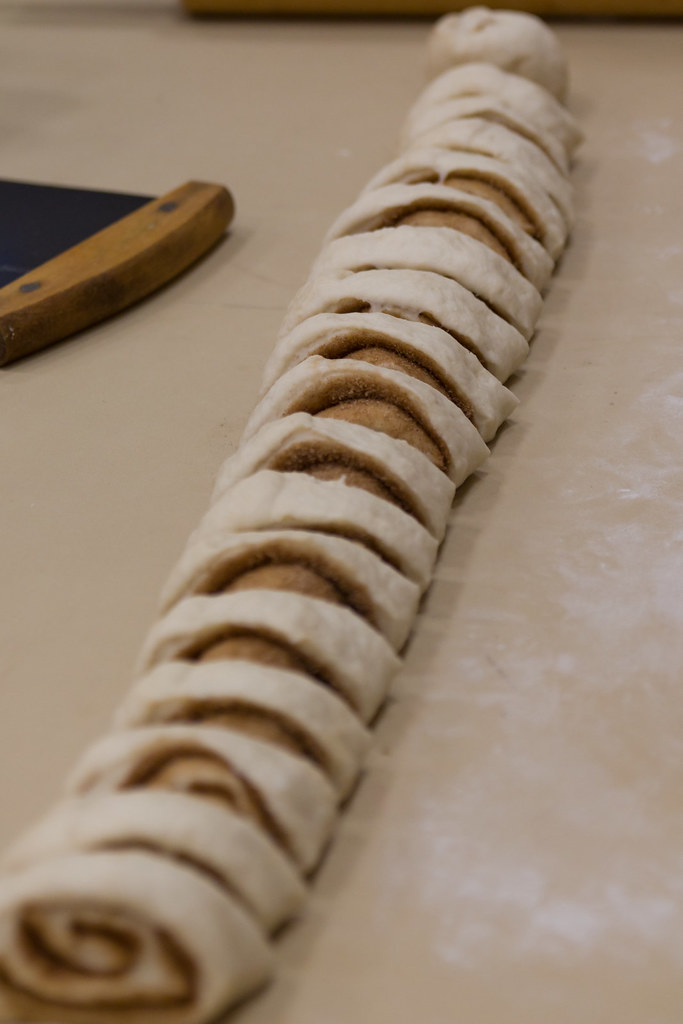
For Cinnamon Rolls: 1. Flour or spray table top to keep dough from sticking. 2. Use rolling pin to roll out dough into a rectangle. Be careful not to roll too think. Dough should be no thinner than 1/4 " thick.
3. Brush melted butter over the surface of the rolled out dough. 4. Sprinkle evenly with cinnamon and sugar, leaving about 1/4" border around the edge of the dough rectangle. . We used 1/2 cup cinnamon to 4 cups white sugar. (Brown sugar or combination of white and brown can also be used).
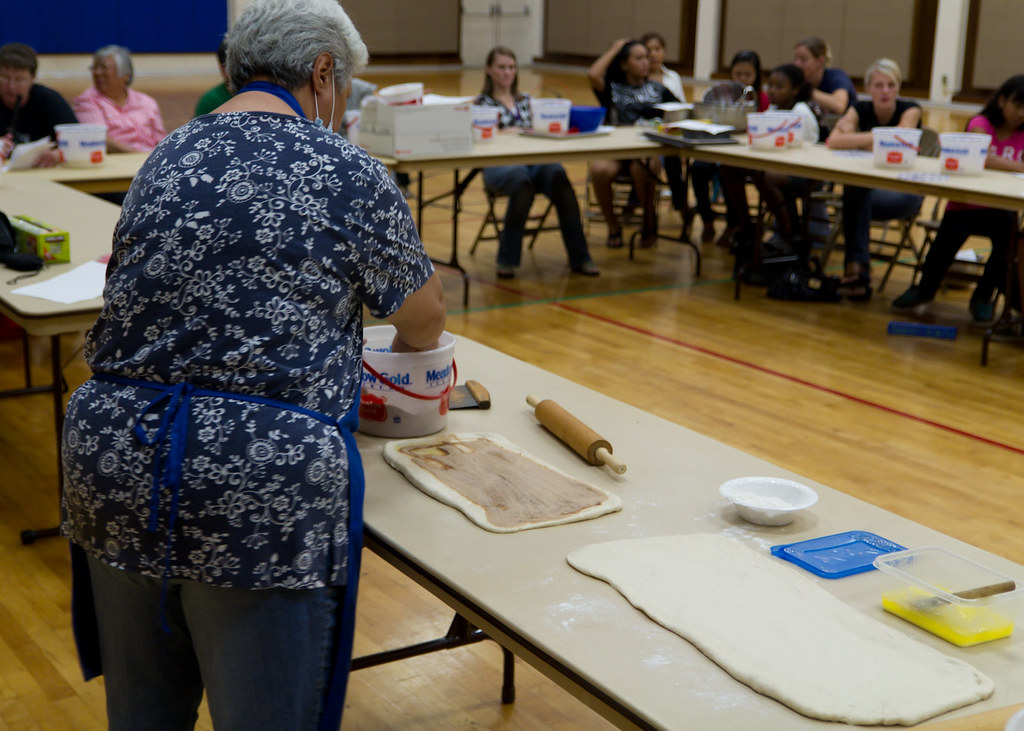
Pat down sugar cinnamon mixture.
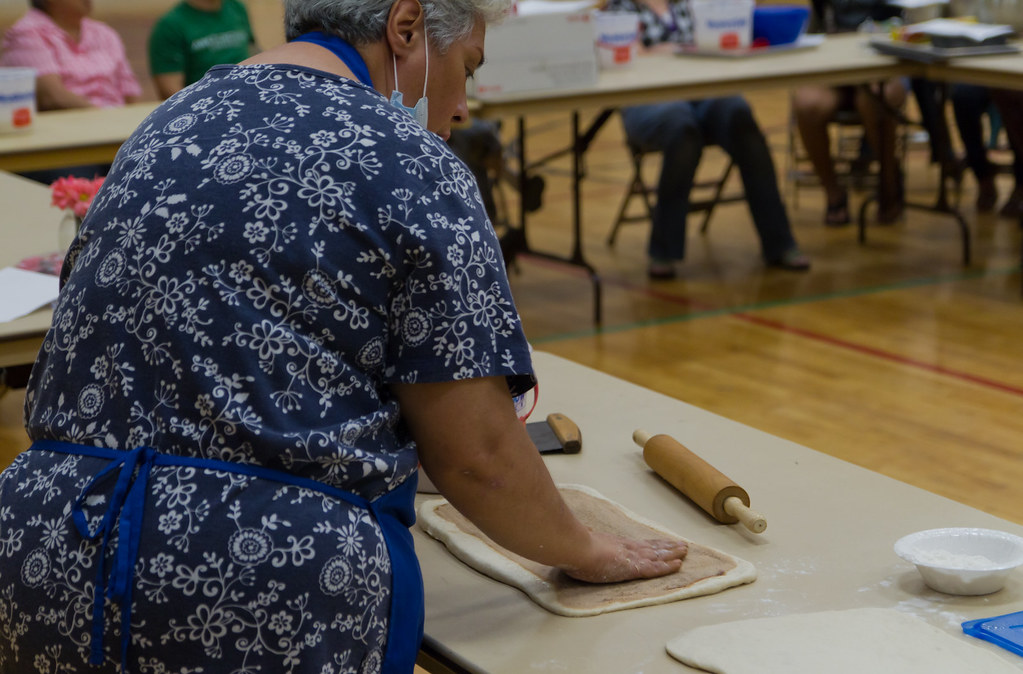
5. Roll up rectangle with cinnamon/sugar tugging on the dough a little as you go to keep the roll nice and tight -but not too tight. Until dough is formed into a long roll.
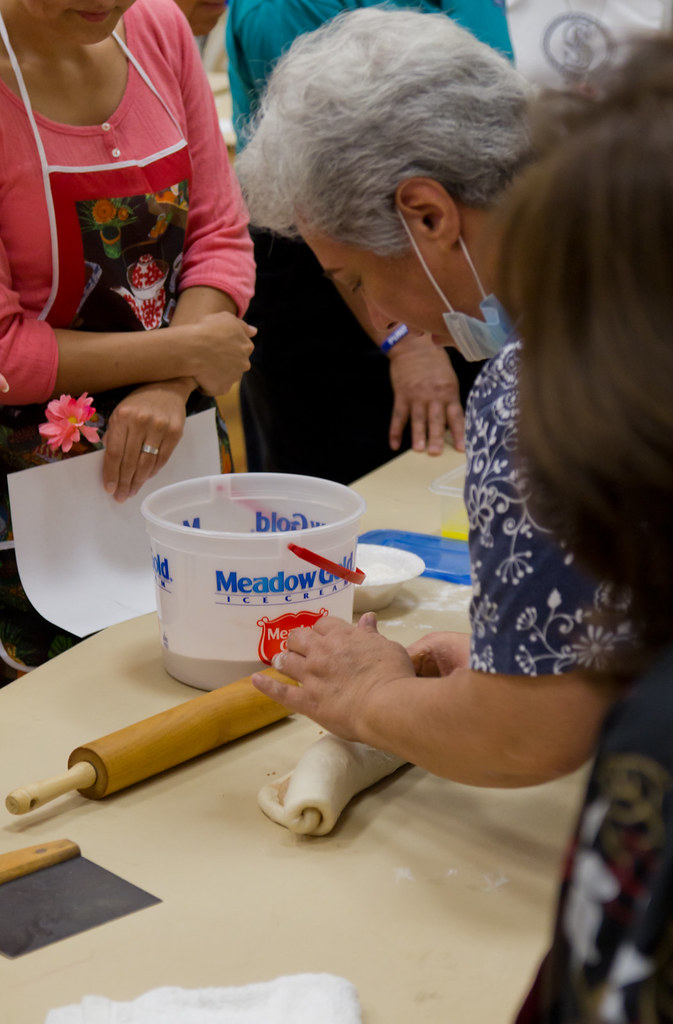
6. Pinch seam closed and cut into 1 1/2" to 2" sections.
7. Place evenly on baking dish.
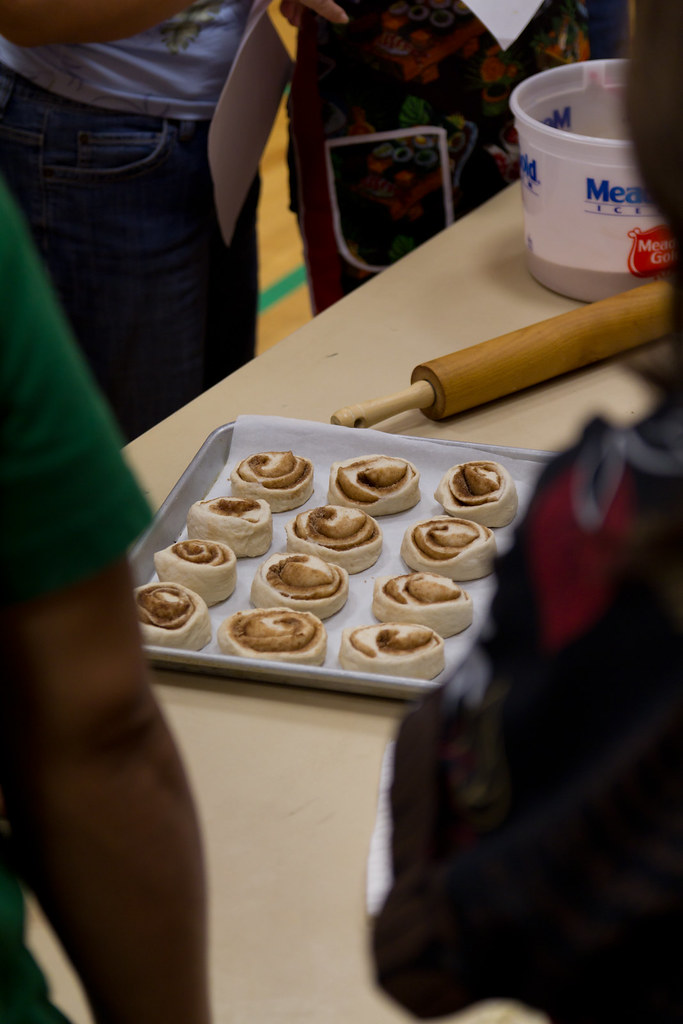
8. Bake 20 - 30 minutes until golden brown @ 350 degrees.