Wednesday, July 13, 2011

Sommer's Breakfast Burritos

For Father's Day this year, I made Breakfast Burritos for the Bishopric. I am so grateful for our "Father of the Ward" Bishop Zakimi who does so much for everyone in our ward. Brothers Nite and Saifoloi his counselors,  also are a great support. My husband Scott is the Ward Executive Secretary and faithfully attends the PEC meetings each Sunday- he's not a father yet but I appreciate him so much, he's gonna be an awesome daddy someday...so far he's a pretty cool uncle :o)

Church doesn't begin until 11:00 am for us but the Bishopric and Priesthood leaders get together each Sunday at 8:00 am. As the Relief Society President I'm usually a the church for other meetings at least 2 hours early. So for us EVERY Sunday has become Fast Sunday in our house. So this Southwest Favorite was a much appreciated treat for Father's Day.

Here are my secrets to a quick and yummy family favorite inspired by the Beto's Breakfast Burritos.

I made 15 burritos so I  super sized the recipe. You can easily scale it down though.

Ingredients:
15 Burrito-sized Flour Tortillas
4 Large Potatoes
1 Large Onion Chopped
1 lb bacon
2 cups cheese
10-12  eggs
Salt and Pepper to taste
Fire Roasted Green Chilies  (Sommer's "Secret" ingredient)

1. Begin by peeling, rinsing and chopping  your potatoes into small bite sized cubes.

Sommer's Secret: To save time and because I don't have a large range, I throw my cubed potatoes in the microwave to get a head start on the cooking.

IMG_7083

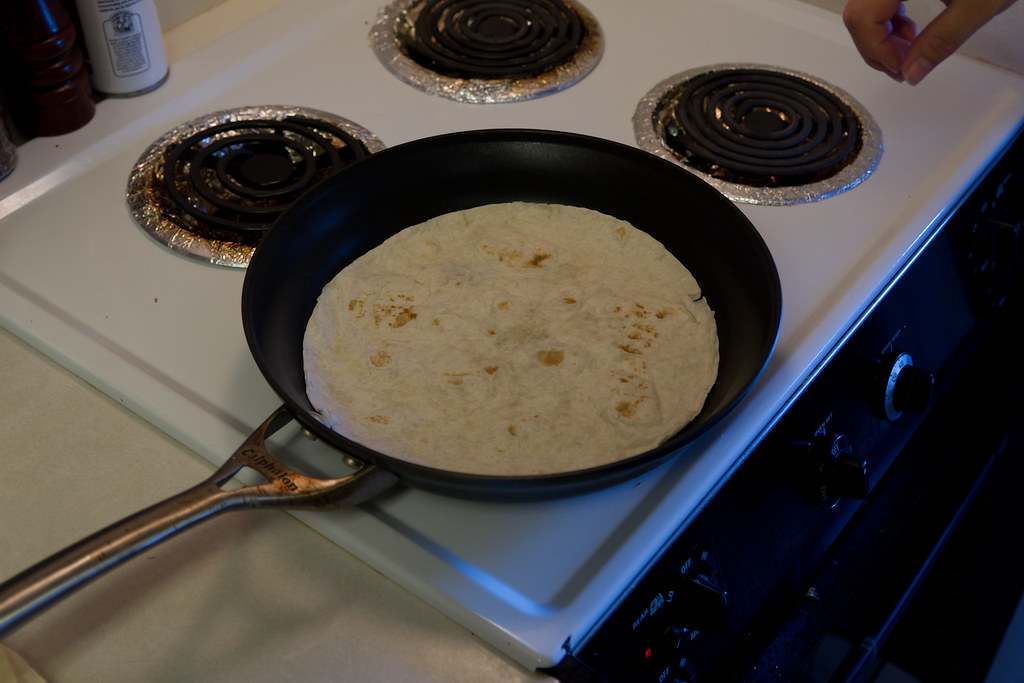
2.. Warn the ready made tortillas in a hot skillet.

IMG_7059

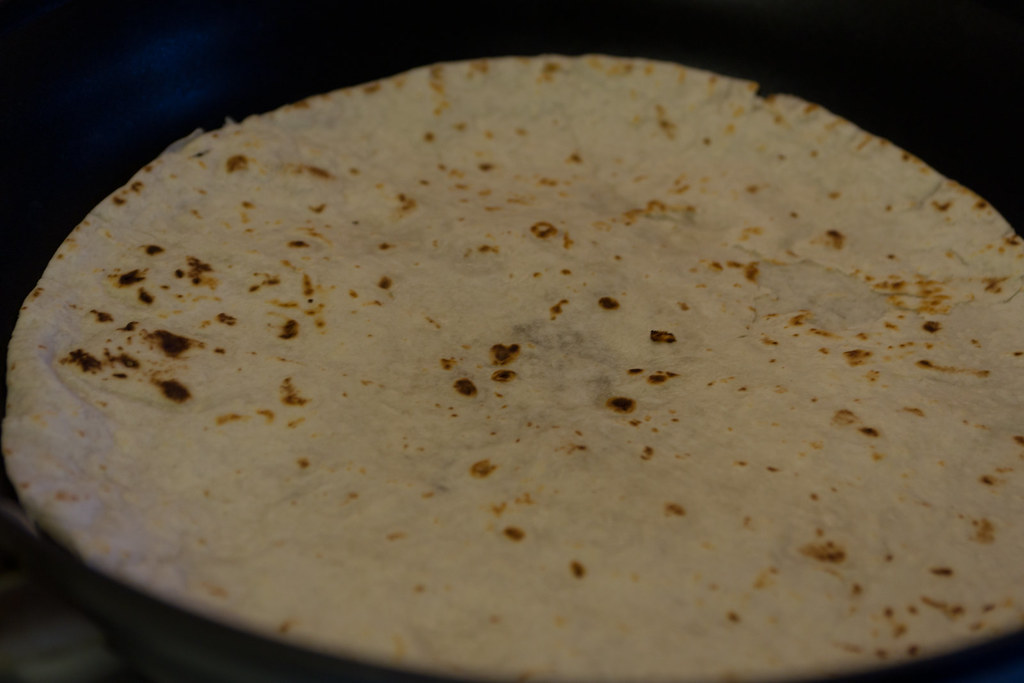
Sommer's Secret:  I let them sit on the hot skillet until they just begin to brown and begin to get puffy and a little crispy. This adds a crispy, chewy texture to the tortilla and gets rid of any "raw flour" flavor that is a dead give away to an amateur burrito maker.

IMG_7061

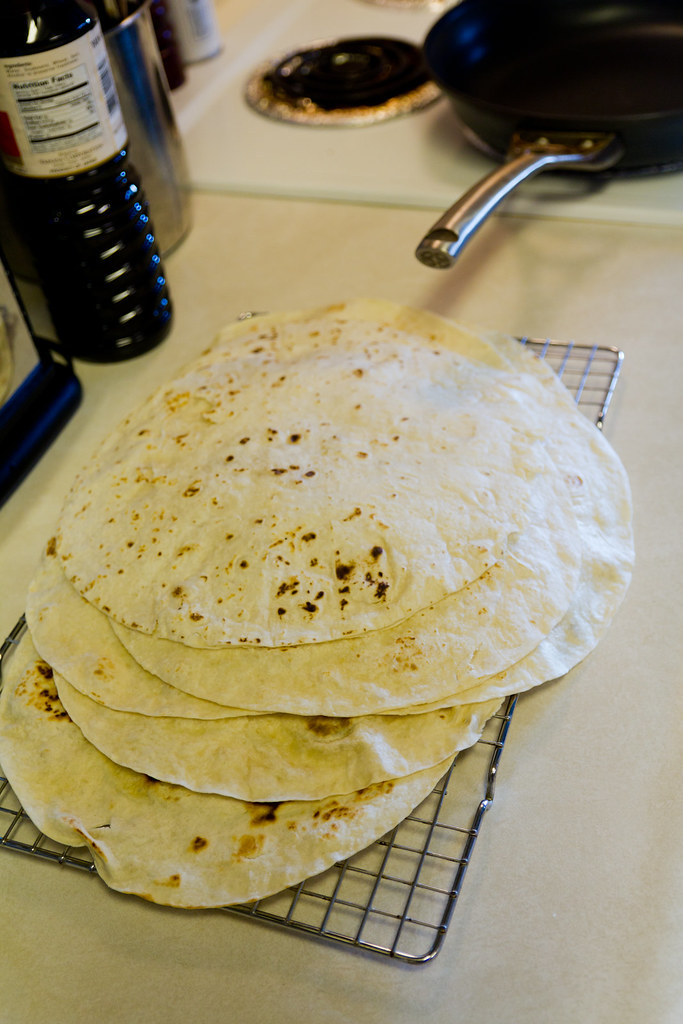
Sommer's Secret: I use a cooling rack to keep the bottom tortillas from sweating out and getting soggy.

IMG_7062

3. While the potatoes are cooking in the microwave and between flipping the tortillas I get the other ingredients ready....

Chop the onion.

IMG_7065

Cut the bacon into bite sized pieces.

Sommer's Secret: When making just a few burritos keep the bacon frozen and just saw off a few strips...it's a little easier to cut when frozen.
IMG_7064

Crack eggs into a bowl and beat in a bowl until fluffy.
IMG_7080

4. After you've browned the tortillas, set them aside and use the same "preheated" skillet and drop in your chopped onion.
IMG_7067

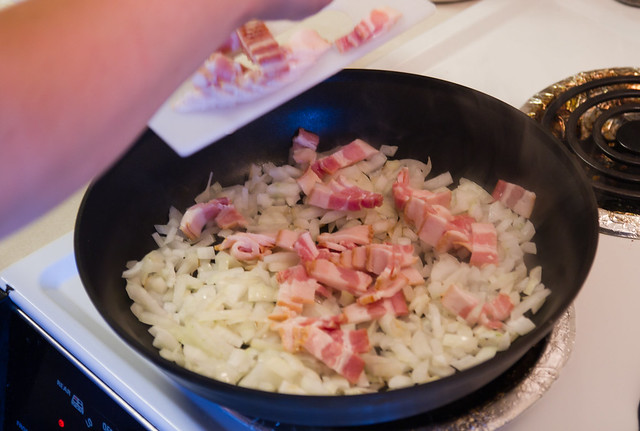
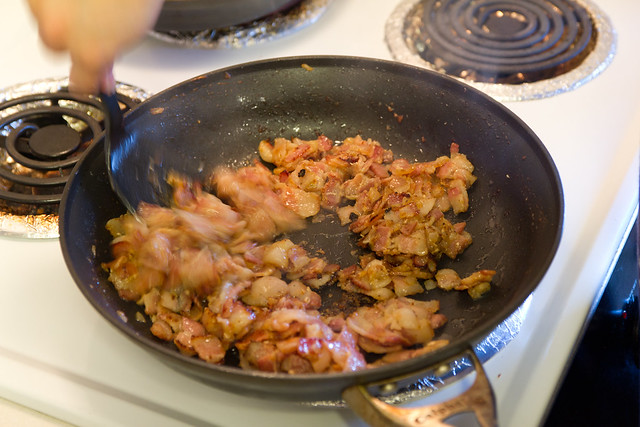
5. Add the chopped bacon.

IMG_7072

Sommer's Secret: DON'T STIR JUST YET. Scotty and my in-laws really hate raw crunchy onions. Something I've learned over the years when cooking with meat and onions is to place the cut or crumbled meat (ground beef, pork, turkey etc) on top of the raw onions and let everything heat through. As the fat in the meat begins to render (or melt) it partially steams and softens the onions at the same time so that the meat and onions are cooked at the same time.  If you stir it all up right away the meat will cook before the onions -which is great if you like the crunchy texture otherwise wait.....you'll be rewarded with yummy perfectly cooked tender and caramelized onions.

IMG_7075

4. Once the bacon and onions are cooked through. Remove to a plate covered with a paper towel to drain the excess oil. (notice I didn't add any extra oil to the pan...)

IMG_7085

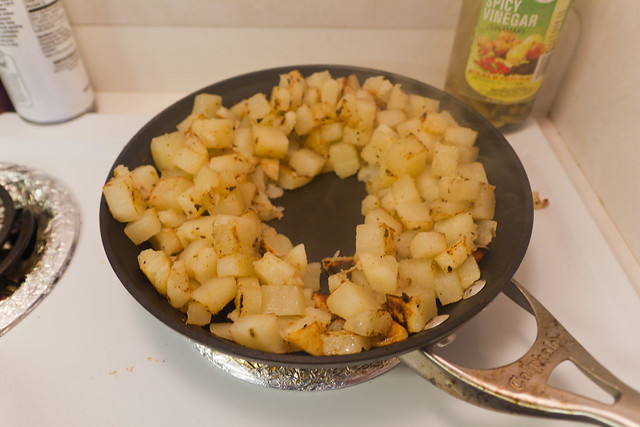
5. Using the same pan, replace the bacon and onion mixture with the pre-steamed potatoes to get them nice and brown. 9 Because I was making so many burritos I divided the potatoes among 2 skillets so they would brown quicker.)

cropped potatoes

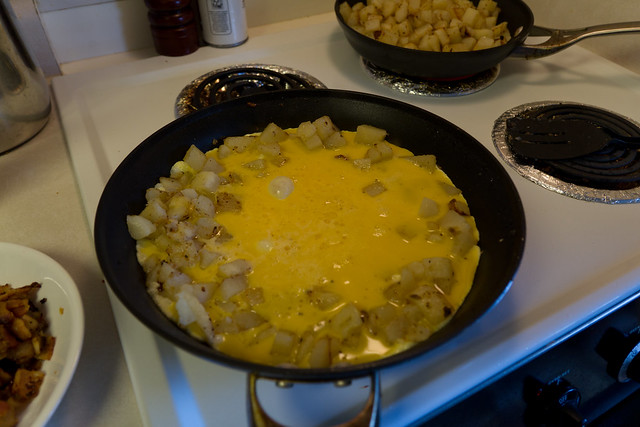
6. After the potatoes are nice and caramelized, create a "well" in the middle of the potatoes.
Sommer's Secret: I learned this trick from making fried rice, I like it cuz you don't have to move the potatoes to another dish.
IMG_7093

7. Next pour the egg mixture into the middle of the well.
IMG_7091

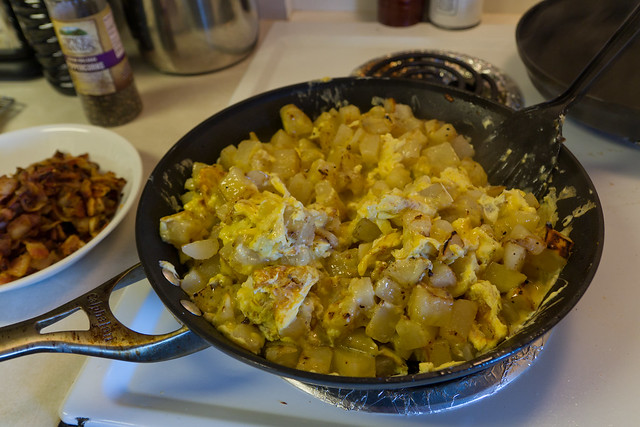
8. Stir slowly to allow the eggs to scramble.

IMG_7095

9. Turn off the heat, then add .......
                                                    .......the rest of the potatoes......
                                                                                                      ..........Bacon..............

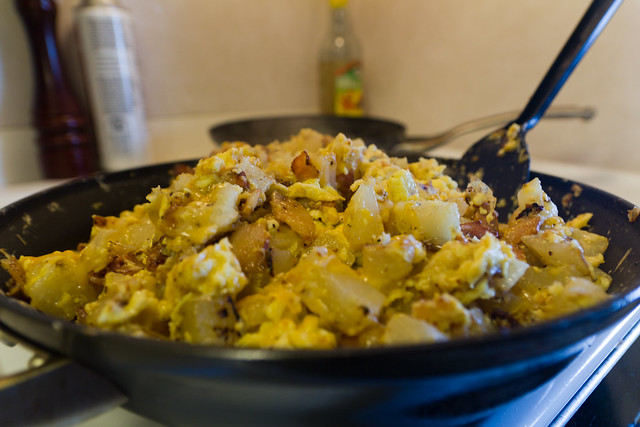
IMG_7096

.........................and ....................cheese........................yummmmmmmmm.......

IMG_7097

10. Stir to combine.

IMG_7098

Now the filling is done and you are ready to assemble your burritos.

I like to wrap each burrito individually. Since I want to keep them warm and will be serving right away I chose foil. If you are making the burritos to be eaten immediately you can forgo the wrapping . If preparing ahead for another day plastic wrap works well for reheating the burritos in the microwave.

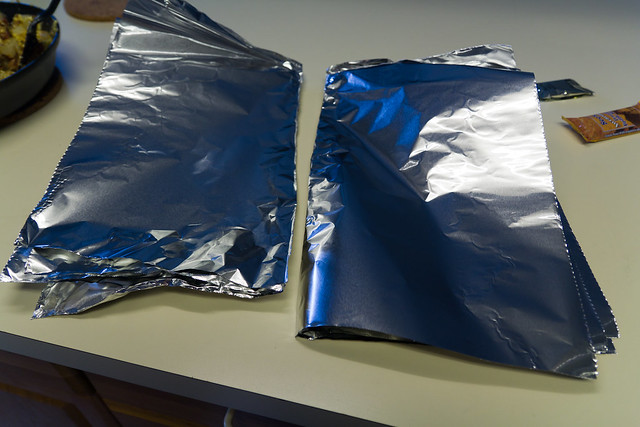
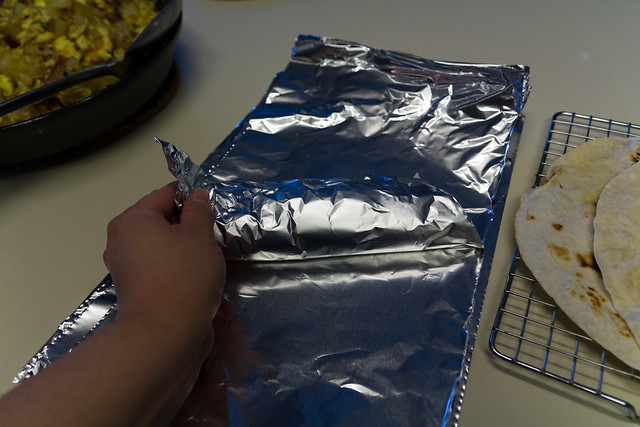
1. Tear off enough foil to individually cover each burrito.

Sommer's Secret: It doesn't have to be exact. I use the large foil and cut them down the middle.
IMG_7099

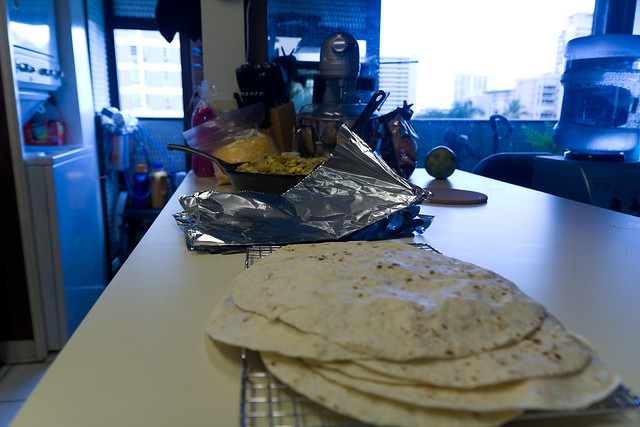
2. Create your assembly line... Tortillas, filling and wrappers....

IMG_7100

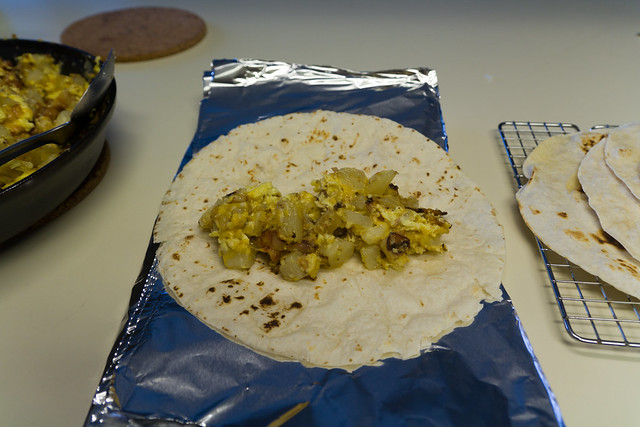
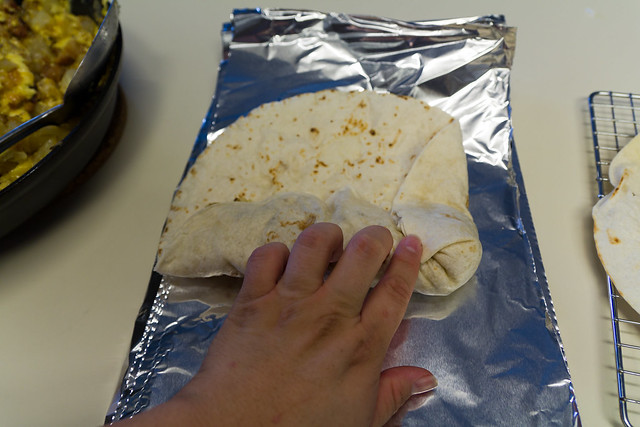
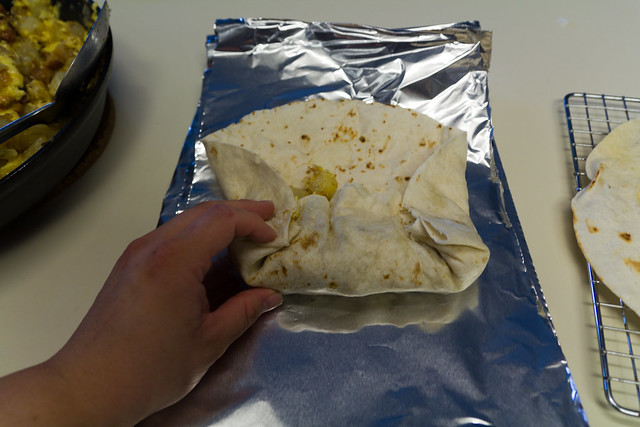
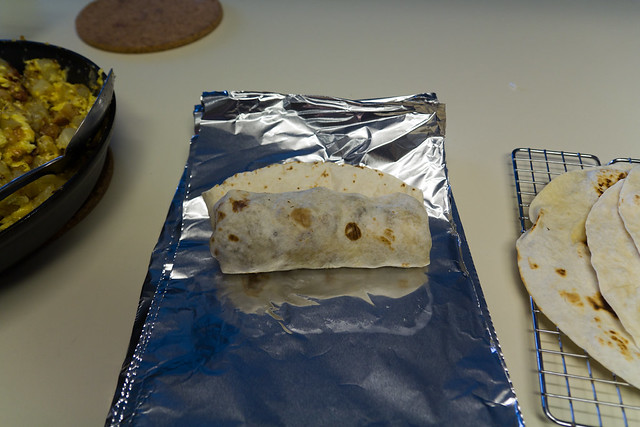
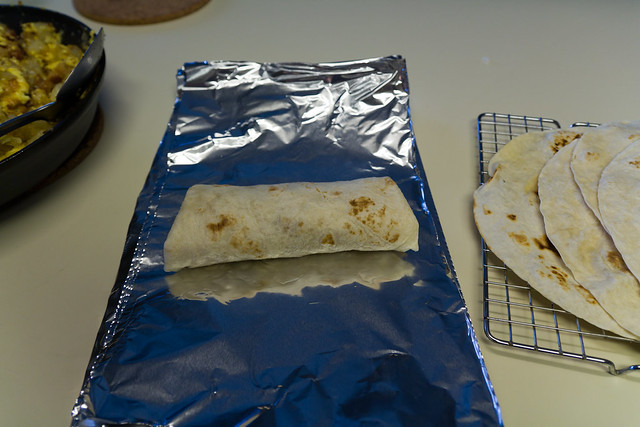
3. Fill each tortilla with filling and roll tightly.

IMG_7102

IMG_7103

IMG_7104

IMG_7105

IMG_7106

IMG_7107

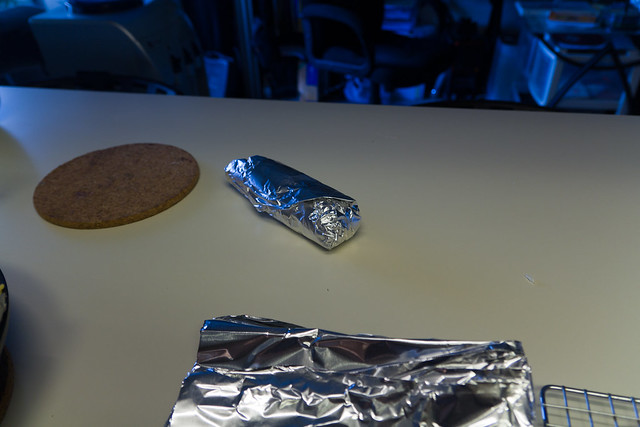
4. Roll in foil to wrap!
IMG_7108

IMG_7109

IMG_7110

IMG_7111

5. And repeat!......and repeat.....and repeat!

Sommer's Secret ingredient: Chopped New Mexico Green Chilies aka Hatch Green Chilies (fresh roasted is best)- It's hard to find them at a good price in Hawaii and I didn't have any on hand so the Bishopric missed out this day :o(.......trust me....green chilies are the best!

Tuesday, April 19, 2011

Sommertime Chop Suey

While I am definitely NOT an expert at Asian Cuisine, Chop Suey is definitely one of those dishes that just about anybody can make. I especially love it cuz you can pretty much use veggies you have on hand in the fridge. There are so many ways you can make this dish. Adding various ingredients really changes the outcome. If you don't have something on hand, simply exclude it- that's part of the adventure!
IMG_0233

Sommer's Secrets: I found that ginger, oyster sauce and SESAME OIL are the secrets to making this dish taste more "authentic". I love going to Chinatown to get my ingredients although they are pretty much everywhere here in Hawaii. If you look in your produce section you can usually fine "fresh" ginger and garlic in a tube- so easy to use. If you ever get a chance try some lemon grass or lime leaves- which also come in a tube- they really "brighten" the dish.

Ginger: I like using fresh Ginger Root but if you don't use it very often a good substitute would be the ground powdered ginger you have in your cabinet. When I first started using this I didn't quite know what to do with it. My favorite way to use it is to peel and then use a fine grater or micro plane to really expose the fresh flavor. It's my secret ingredient to add to my beef stew. Or you can slice it up with skin and all for a more subtle flavor. Just remember to either take out the ginger bits or you might get a nice surprise if you're not used to eating raw ginger.

Oyster Sauce: This is my new favorite ingredient to give food that Asian flare. You Gotta try Scotty's Oyster Sauce grilled or baked chicken - similar to shoyu chicken it's VERY yummy. hmmmm.....I'll have to post that sometime.....Oyster sauce is  similar to a thick soy sauce....kinda like teriyaki sauce, not quite as sweet, is salty and has a subtle "fish" flavor-definitely not fishy and is actually really good.....if you want REAL "fishy" we'll talk about fish sauce some other time......

Sesame Oil: I LOVE Sesame Oil! I can't believe how it is so yummy.I prefer Black Sesame oil which can be a little stronger in flavor but pretty much any sesame oil will do.A little goes a LONG way! Add a few drops  for a very Asian flavor. I usually don't cook in sesame oil rather I use it as a finishing touch to add flavor so I usually add it towards the end after most of the cooking is done because of it's lower temperature smoke point. It really flavors my fried rice nicely and I can't live without it anymore.

Here's my take on Chop Suey:

Ingredients:

2 TBS veggie oil
1/2 pound of meat
1 tsp minced garlic
(or garlic powder)
1 tsp finely minced ginger (or ground ginger powder)
2 cups favorite chopped or sliced veggies or use the frozen stir fry blend (thaw & drain first)cut in to bite sized pieces (any kind you like, chicken, pork, beef etc)
1 small onion chopped ( you could use half of a med sized onion- I buy smaller onions so I can use the whole thing instead of part of it and they seem to be sweeter)
1- 2 cups bean sprouts (I use the chop suey mix with carrots and cabbage mixed in)
1/4 cup sliced green onion (about 3-4 green onion stalks)

Sommer's note: I like fresh veggies and usually use  about 1/2 cup sugar snap peas, 1/2 cup broccoli 1 cup cabbage 1/4 cup thinly sliced carrots and celery and 1/4 cup sliced green bell pepper or what ever I have on hand)

Sauce:
1 TBS cornstarch
2 TBS water
1/4 cup oyster sauce*
1 tsp sugar
2 tsp soy sauce
(Because it can be too salty I usually omit the soy sauce)
1/4 tsp sesame oil*if no oyster sauce on hand: increase soy sauce to 2 TBS , and sugar to 2 tsp

1. Whisk together all ingredients for sauce in a small bowl. Set aside
2. Heat 1 TBS veggie oil in skillet or wok. ( I have an electric range so a wok doesn't really work)

3. Add chopped onion, minced ginger, (lemongrass if using), garlic and meat. Stir fry (cook on high heat stirring constantly) until meat is cooked through and onion is semi soft and translucent.

4. Transfer onion and meat to plate and set aside.

Sommer's note: If you add the veggies to the meat and onion, by the time the veggies are cooked your meat and onion will be over cooked resulting in dry, sometimes rubbery meat and burnt onion.

5. In same skillet, heat another 1 TBS veggie oil and stir fry  all veggies except green onion and bean sprouts.

6. When veggies are tender but still crisp add meat mixture, and bean sprouts.

7. Pour in sauce mixture, stirring constantly until sauce thickens.

8. Add green onion at very end as it wilts practically as soon as it meets the heat.

9. Serve over prepared rice- steamed rice preferred although you could use that minute rice stuff...(can't believe I used to eat that...no judgments from me though!)

Sommer's Secret: Don't overcook the veggies. They should be tender but crisp and "snap" when you bite into them. lessen cooking time if using previously frozen veggies be sure to drain the thawed veggies well or you end up steaming everything and it's not as crisp.

To make it more Chow Mien- add noodles, either crunchy or soft. I like to top with Fried won ton strips or you could use, chow mien noodles.  Add blanched slivered almonds or cashews  for extra crunch. so yum! ....not too bad for a girl from the rez!

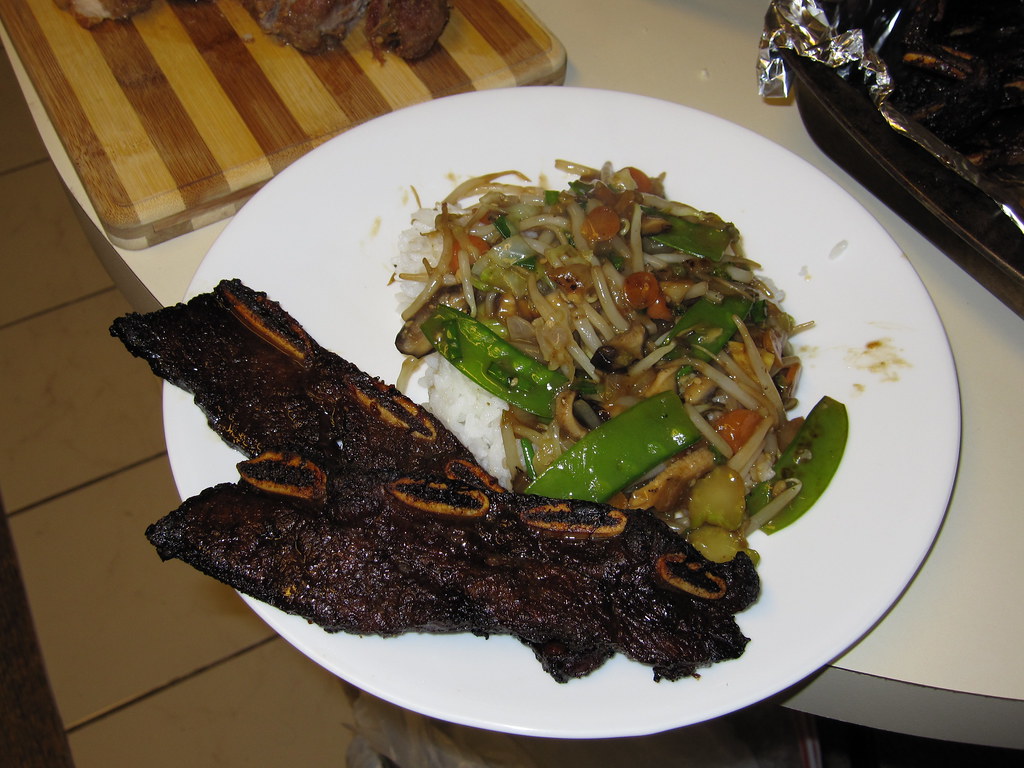
IMG_0236

Note: in case you're wondering; the meat is Korean spareribs called Kalbi- I like mine cooked to death- guess it's just the Navajo in me! I'll have to have Scotty show how to do those too- another yummy favorite.

Saturday, April 9, 2011

Sommer's Candied Walnuts

I'm trying to be healthy, but it is SO hard. The main problem I have is that I have to plan ahead otherwise I end up trying to find something to eat at work. Thankfully I have a stash of homemade oatmeal packets in my drawer at work for a great go-to breakfast. But lunch and snacks are another story..... So this week I decided that I was gonna try and eat salads for lunch, and of course I procrastinated and didn't make a salad for Monday, so I decided to go get one of my favorite salads at this restaurant downtown called Alii Grill. Guess what? They changed ownership! They are now Any Kine Grill.... ugh....after a quick panic attack I realized they still had on the menu my favorite Alii salad (now known as Any Kine Salad). It's greens with grilled chicken, mandarin oranges and my new favorite CANDIED WALNUTS!! I was so relieved. Unfortunately, my relief quickly turned to disdain as I opened up my salad box to reveal that the salad is so NOT the same anymore AND the forgot my walnuts! aaahhhhhh! I guess they really are "any kine" grill since any kine goes!

Anyway, I spent the afternoon (between getting work done of course) browsing some recipes on the internet and planning out my trip to Sam's Club to get some walnuts which resulted in 3 tries in two evenings to get the recipe just right.

Sommer's Candied Walnuts (Recipe #1)
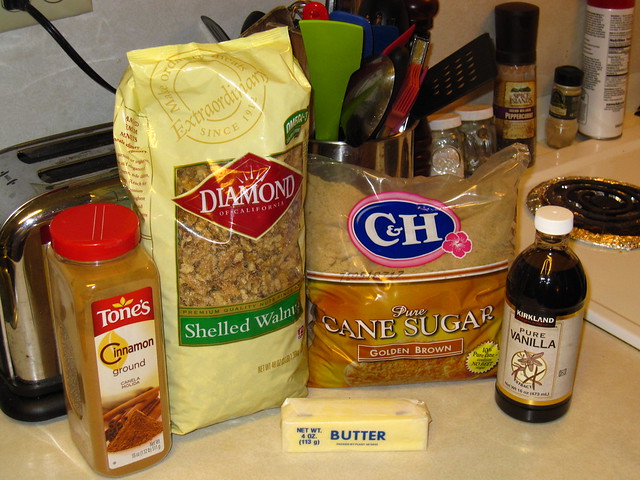
2 cups Walnuts
1/2 cup granulated sugar
1/2 cup brown sugar
2 tsp ground cinnamon
2 tsp vanilla
3 tsp butter
IMG_0070

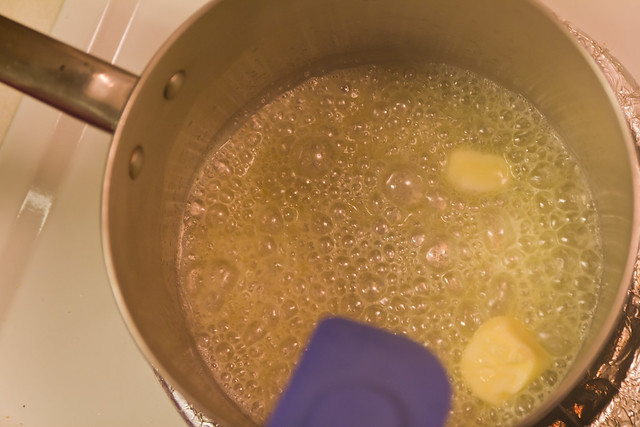
1. Begin by melting butter in a sauce pan on medium high heat.

IMG_5248

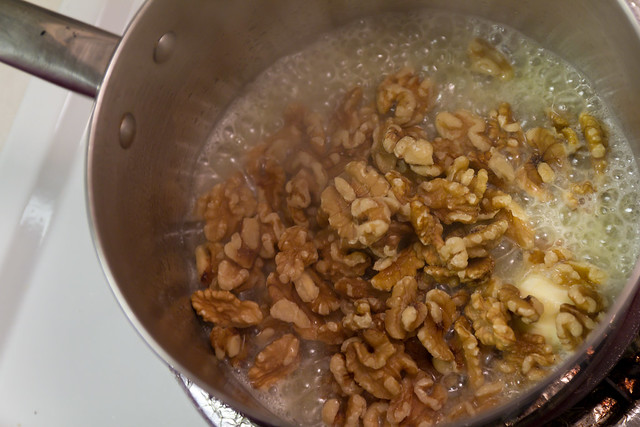
2. Add walnuts and cook until walnuts are golden brown and toasty.

IMG_5249

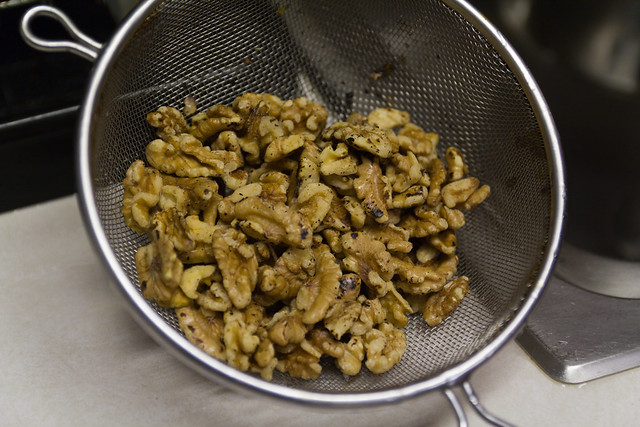
Sommer's Secret: Be sure to rinse the walnuts BEFORE cooking them. I didn't do this the first time and all the little walnut crumbs burnt and the ending result was more bitter but still turned out okay.

IMG_5273

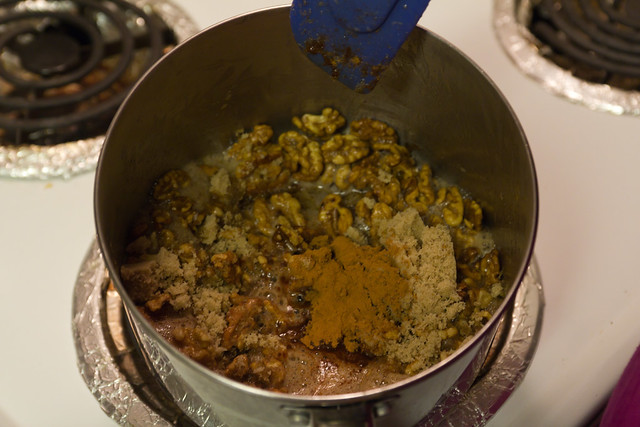
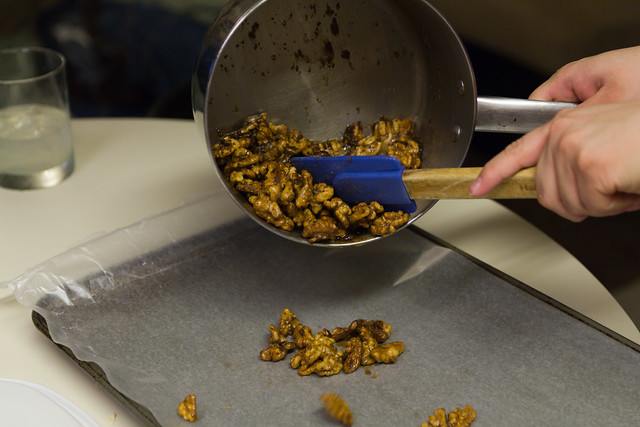
3. After walnuts are golden add sugars and cinnamon. Stir constantly until the sugar melts, all nuts are coated and the mixture begins to thicken.

IMG_5259
4. Add vanilla.

Sommer's Secret: Remove pan from the stove before adding the vanilla. Be CAREFUL! The vanilla has alcohol in it so it bubbles and sizzles on contact.

5. Pour onto wax paper lined baking sheet.

IMG_5263

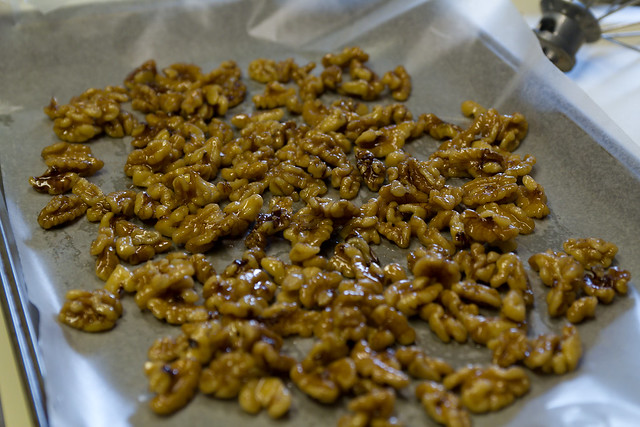
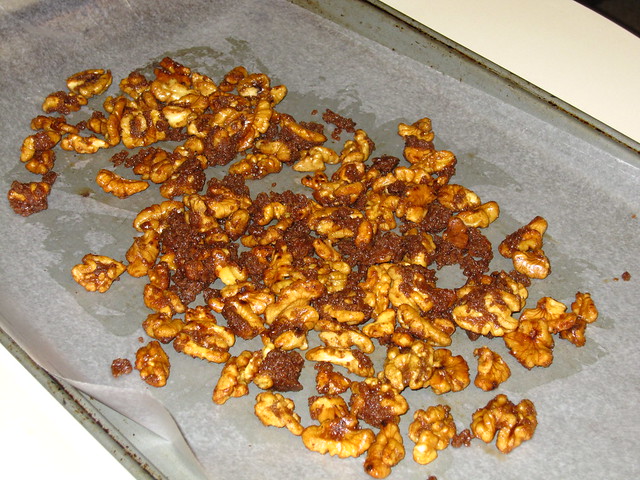
6. Spread out and allow to cool.

IMG_0077

Sommer's note: Recipe #1 ends up more like the candied nuts you buy at the mall kiosks, the theatre or around Christmas Time. (Fun fact: did you know sugar plums are actually candied nuts? )The resulting mixture has little nuggets of sugar clumpy things which are actually pretty good. I wanted more of a glaze on my walnuts so I tried a few variations. If you are looking more for a "glazed" or honey coated nut. Try Recipe #2

Sommer's Candied Walnuts (Recipe #2)
1/2 cup granulated sugar
1/2 cup brown sugar
1 cup walnuts (rinsed and pre-roasted)
1 cup water
2 tsp ground cinnamon
2 tsp vanilla

(Sorry- I was so excited to try a different process I forgot to take pictures....)
1. Combine water and sugars in a sauce pan over medium-high heat. Bring to a boil.
2. Boil until mixture becomes thick and golden in color.
3. Add walnuts and cinnamon.

Sommer's Secret: I loved the flavor of the roasted nuts in Recipe #1 so I recommend roasting the walnuts 1st by rinsing, spreading the nuts into a single layer on a baking sheet in the oven for 10-15 minutes. Stiring once. Be sure to watch them so they don't burn. You can also roast them in a frying pan on the stove top adding a little butter for added richness.

4. Boil syrup mixture, walnuts, and cinnamon for about 2 minutes. Stirring constantly so it doesn't burn.  Mixture will still be consistency of  "watery" syrup.
5. Drain the mixture to allow for excess syrup to drain off.
6. Pour walnuts on a baking sheet lined with wax paper and spread out. Allow the nuts to cool.
IMG_5286

I decided that I liked both recipes depending on what you want to use them for. I like the "glazed" ones more for my salads and the "candied" ones for eating. I'm looking forward to trying some other nuts like my all time favorite Almonds and my newer favorite cashews......hmmmm maybe some mixed nuts would be nice!
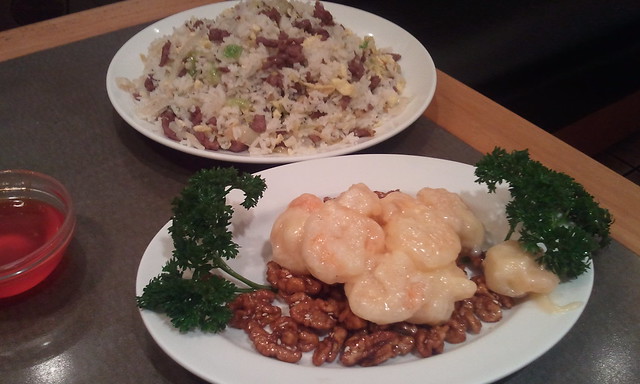
Sommer's side story: I usually don't like walnuts as they can be slightly bitter and seem to leave a "drying" sensation in my mouth. But I have come to adore them candied in Chinese Honey Walnut Shrimp....so GOOD!
2011-03-14 20.02.59

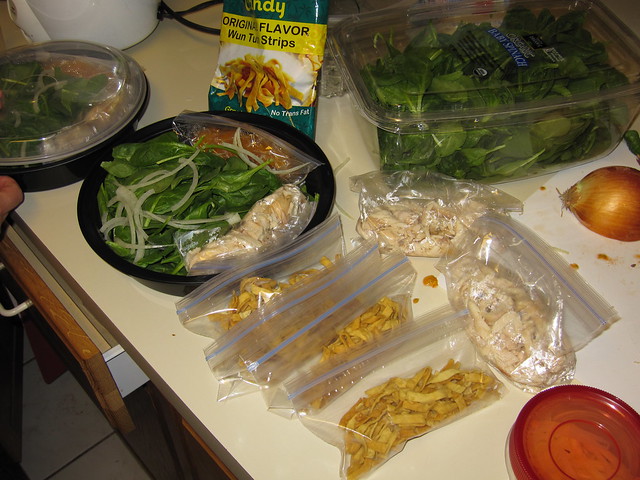
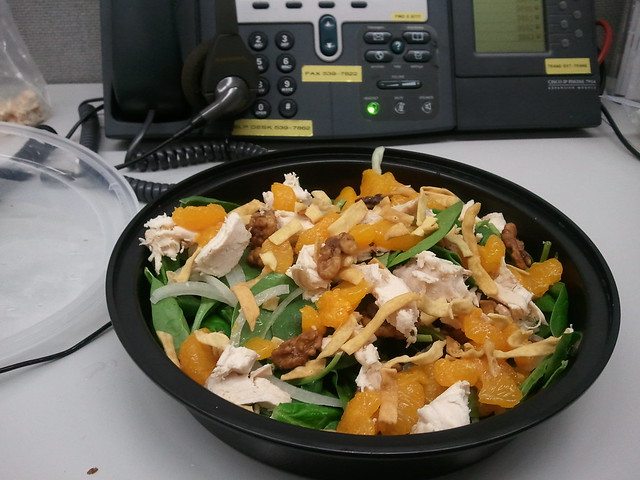
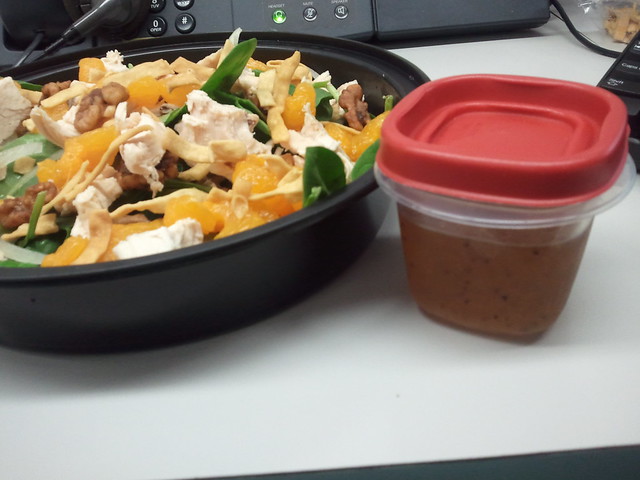
The same night I made my walnuts I put together a "Sommer Salad". I found that I can trick myself into thinking I bought a gourmet lunch if I try and make it look like I bought it. I use a container I saved from when I got a salad at Costco. I was so proud of myself for making it look so pretty.

I used:
Spinach
Thin sliced Onion (love onions!)
Skinless Chicken pieces (left over from Sam's club rotisserie chicken)
Won ton strips
Drained canned Mandarin Oranges and
HOMEMADE candied Walnuts.

I made 2 and packaged them so they would stay nice and crispy until lunch.

IMG_0064

When lunchtime came I had fun assembling my masterpiece. It was so fun when people kept asking me where I bought my lunch!

2011-04-05 11.11.11

In case you're wondering I used store bought salad dressing although I got a good recipe for a homemade oriental salad dressing from the Stake Relief Society that would go great, I just need to remember where I put it!
2011-04-05 11.11.53

I enjoyed watching an episode of "Biggest Looser" at my desk.

2011-04-05 11.13.12

I washed it all down with some water out of my BIG cup.....yeah, I'm getting pretty good at drinking water these days.....looking forward to lunch tomorrow!
2011-04-05 11.13.24

Thursday, March 31, 2011

My first video! How to make yummy pizza!

Sommertime Pizza!

IMG_4899
Ingredients:
2 TBS Self Acting Yeast (Fast Rising)
2 TBS Granulated Sugar
2 cups Warm Water (temperature you would you for a nice bath)
1 tsp Salt
2 TBS Olive Oil
4 cups flour

yield: 2 pizza crusts

Directions: 


1. Combine warm water, sugar and yeast in a bowl. Set aside 5-10 minutes to allow yeast to activate. Result will be frothly & bubbly mixture.

2. Add salt, olive oil and 1 cup of flour. Fully incorporate flour.

3.  Add 1 cup flour and mix in until mixture is smooth.

Sommer's Secret: The beginning of your dough will effect the end result of your dough. Your dough's texture will dictate what your bread will be. If it is hard and dense your bread will be dry and tough.


4. Slowly add in additional flour until the dough begins to pull away from sides of the bowl.

Sommer's Secret: Dough should be somewhat sticky and elastic. Amount of flour needed will depend on weather and climate. Don't add so much that the dough is not sticky at all. The dough has the consistency of it just coming together and it is really moist- you'll have to fight the temptation to add extra flour. Use more oil on your hands to keep the dough from sticking too much.


5. Coat the bottom and sides of a bowl with a few teaspoons of olive oil and place the dough into the pre-oiled bowl. Turn once to fully coat the dough with oil.


6. Cover with plastic wrap and foil. (I don't think the foil does anything but it's always how I've done it!) Set aside and allow the dough to rise until double.

Sommer's Secret: Use a bowl with a lid that will pop up after the dough reaches the top- it takes the guess work out of determining when it's "doubled" in size. A friend recommended using a gallon size ice cream bucket for this an the "popping noise" reminds you it's done!

7. Coat the bottom of your pan with olive oil. You can also sprinkle corn meal on the bottom to keep it from sticking.

Sommer's Secret: Be sure to get fine ground corn meal. I got this one steal cut one that was too crunchy and didn't taste too great....

8. Pat out the dough onto the pan. You can use your hands or a rolling pin if you like.

Sommer's Secret: Use oil rather than too much flour to keep the dough from sticking to keep the bread tender insead of tough.


9. Lightly coat the edges of the pizza crust to assist with browning.


10. Spread a thin layer of sauce. Leaving room around the edges for the crust.

Sommer's Secret: Go easy on the toppings and spread evenly- less IS more. You don't want a soggy pizza. I use a combination of Parmesan and a grated cheese mixture of Provolone, Mozzarella and Cheddar for added flavor dimension. After adding on the toppings I add one more thing layer of cheese to seal the toppings in once the cheese is all melted.

   
 11. Bake 15- 20 minutes at 350 degrees until golden brown.


Sommer's Secret: Preheat oven to 400 degrees and then turn down to 350 when you put the pizza in the oven.


11.  One final swipe of olive oil around the pizza crust allows for a pretty sheen and keeps the crust soft especially in drier climates.


12. Cut into slices and enjoy!